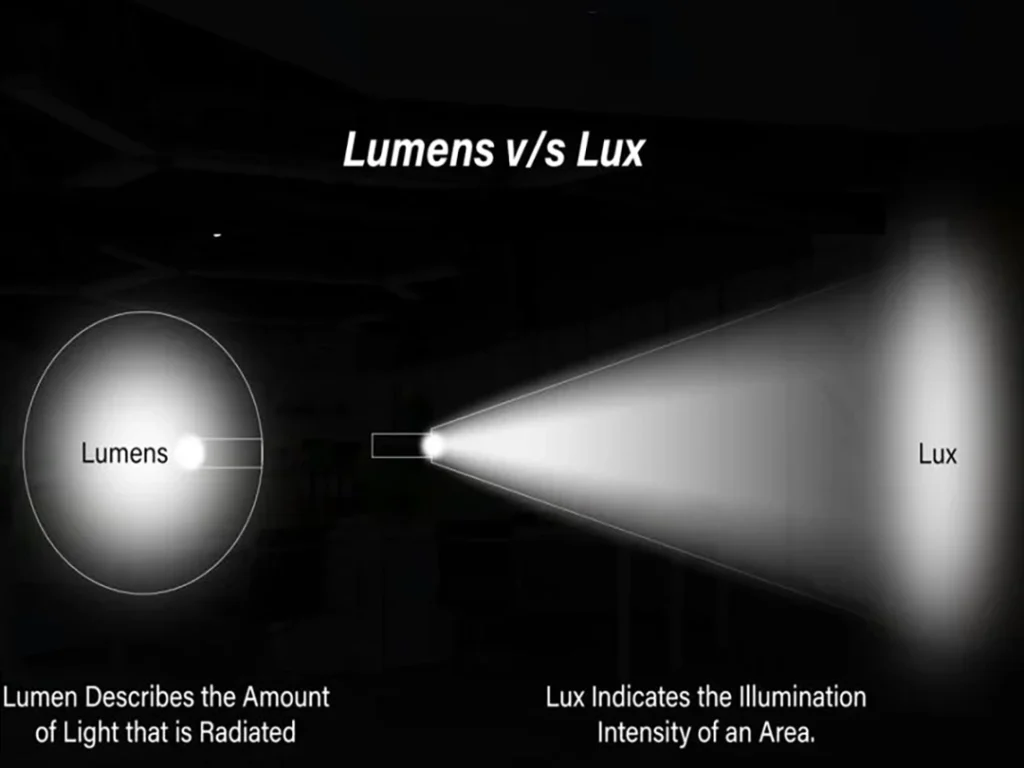
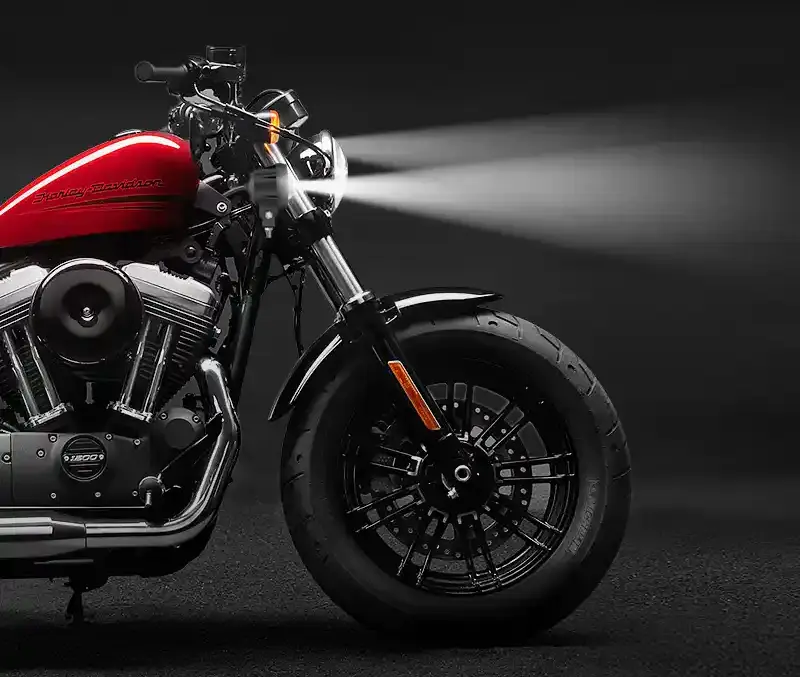
Choosing a motorcycle headlight sounds like a simple shopping decision—until you’re riding home late, the road turns glossy after rain, and your “fine” stock light suddenly feels like a candle with confidence issues. That’s usually when riders start looking at upgrades: halogen, HID, LED, and anything labeled “projector.”
This post is not a repeat of the last one. Instead of debating reflector vs projector theory, we’ll stay firmly in the “What should I buy for my bike and my life?” lane: how the common headlight types stack up, what an upgrade realistically costs, what to check before you trust the box specs, and why a headlight projector lens bulb can be the sweet spot for many bikes.
You’ll also see a couple of everyday rider scenarios—because the best headlight choice isn’t “the brightest one,” it’s the one that fits your routes, your patience for installation, and your tolerance for troubleshooting.
Projector Headlights for Bikes: Start With Your Riding Reality (Not the Product Page)
Before you compare models, get specific about your use case. Two riders can buy the same light and come away with opposite opinions simply because their riding is different.
Here are the questions that actually matter:
- Where do you ride most? City streets with streetlights, suburban roads, or rural/industrial roads with long dark stretches?
- How fast do you typically ride at night? (Faster speeds punish weak “distance” lighting.)
- How often do you ride in rain/fog?
- Do you want plug-and-play, or are you okay with trial-and-error?
- Do you care about not annoying oncoming traffic? (You should. Your future self will also appreciate fewer angry high-beam flashes.)
Once you answer those, choosing between halogen, HID, LED, or a headlight projector lens setup becomes much easier—because you’re selecting for fit, not hype.
The Four Main Motorcycle Headlight Options (Halogen, HID, LED, and Headlight Projector Lens)
Headlight tech isn’t a straight “newer is always better” story. Each type has its own personality.
1) Halogen: the default that still makes sense sometimes
Halogen is everywhere because it’s simple and cheap. It’s also predictable in many stock housings.
What it’s good at
- Low cost
- Easy replacement (often truly plug-and-play)
- Compatible with stock wiring and reflector design
Where it hurts
- Typical lifespan is limited (often around ~1000 hours, depending on the bulb)
- Lower luminous efficiency: it turns more energy into heat
- Output can feel weak on unlit roads
- Heat can be significant, and the beam can look “yellow and tired” as the bulb ages
Halogen is the “no drama” choice—until your riding conditions demand more.
2) HID (Xenon): bright and efficient, but not always convenient
HID has long been the “serious upgrade” option. It can produce strong light with decent efficiency, but it brings extra components.
What it’s good at
- High brightness potential
- Stable output once warmed up
- Often more efficient than halogen
Tradeoffs
- Requires ballasts/igniters (more parts, more space)
- Warm-up time (not ideal for quick flashing or frequent on/off)
- Can create glare if optics/housing aren’t designed for it
HID can be great, but it’s rarely the simplest answer in 2026 unless you already have an HID-friendly setup.
3) LED: compact, fast, efficient—quality varies wildly
LEDs are popular for good reason: low power draw, long life, quick response, and design flexibility. They also come in every quality tier imaginable.
What it’s good at
- Lower power consumption
- Long lifespan (when cooling/driver quality is good)
- Fast response (instant on)
- Smaller size enables more headlight designs
What trips riders up
- Some LED bulbs have poor optics compatibility in stock housings
- Cheap drivers can flicker
- Poor thermal design causes early dimming (“light decay” or thermal throttling)
- Some LED bulbs create scatter and glare even if they look bright up close
This is why you’ll see riders say “LED changed my life” and others say “LED was a waste.” Both can be telling the truth.
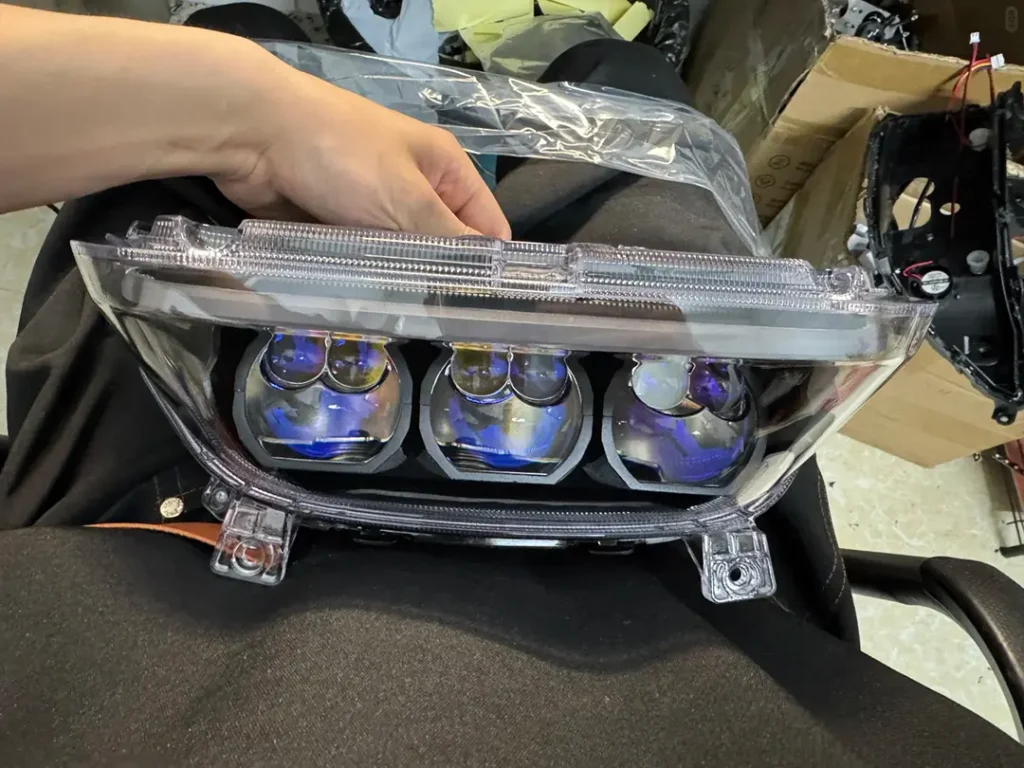
4) Headlight projector lens (lens-based control): often the most “adult” upgrade
A headlight projector lens (either as a full assembly or as a projector-style bulb/module) is about beam control and usable visibility, not just raw output.
What it’s good at
- More controlled beam distribution when designed well
- Better “usable” light placement
- Often cleaner low/high beam transitions in bi-function setups
Where it can go wrong
- Low-quality optics can be worse than stock
- Full assemblies can have sealing issues (fogging/water ingress)
- Installation quality matters more
A lens-based approach can be excellent, but it’s not automatically good just because it has a lens.
A True-to-Life LED Swap Story (Cost, Time, and the “Wait… Is My Headlight Shorting?” Moment)
Let me describe a scenario that feels painfully familiar for anyone who commutes.
A while back, a rider friend was working overtime and started riding home late. He noticed his headlight looked dim, then “wrong”—not just weak, but like it was intermittently failing. His description was perfect: “It feels like something is burning or shorting.” That’s the exact kind of vague symptom that sends you down a rabbit hole.
He checked the basics, saw nothing obvious, and decided to upgrade from his stock 35W halogen. He ordered a three-LED replacement bulb online—nothing crazy-priced, just something that looked reasonable.
When it arrived, the install was almost suspiciously easy:
- Turn handlebars to one side for access
- Unplug the 3-prong connector
- Pull the rubber dust boot
- Release the spring clip
- Swap bulb
- Reassemble
He timed it: under ten minutes, start to finish.
At dusk, he tested it on the street and the reaction was immediate: “Okay—this is actually usable.” Not showroom drama, just the feeling of finally seeing enough of the road to relax.
That story matters because it highlights the real upgrade journey:
- Many riders don’t want a full headlight rebuild.
- The “right” upgrade is often the one you can install cleanly.
- A modest budget upgrade can feel huge if your starting point is weak and your wiring is healthy.
It also hints at the catch: not every LED bulb swap behaves that well. Which brings us to choosing correctly.
How Much Does It Cost to Replace a Motorcycle LED Headlight (and What You’re Really Paying For)?
Prices vary by region and quality tier, but the bigger point is: you’re not just paying for “brightness.” You’re paying for a package:
- LED chip quality (less important than people think)
- Driver quality (very important—stability, flicker control)
- Thermal design (heat sink/fan design and materials)
- Beam pattern compatibility (the thing you can’t fix with marketing)
As a rider, budget not just money but time:
- Time to install
- Time to aim/test
- Time to troubleshoot flicker, fitment, or dust cap sealing if it doesn’t go smoothly
A cheap bulb that forces you into wiring fixes, dust cap hacks, or repeated re-aiming can become “expensive” fast.
Choosing Motorcycle LED Bulbs Like a Grown-Up: Brand, Power, Build, Heat, Fit, Beam Pattern
This is the checklist I wish more listings would teach people to use.
1) Brand positioning matters (because “LED” is not a brand)
Look at what the brand is trying to be. Some brands clearly position themselves around higher output and build quality. For example, leding markets its LED products around innovation, quality, brightness, and manufacturing detail.
That doesn’t automatically make every product perfect, but it’s a better start than mystery listings with recycled photos.
2) Don’t trust box wattage—test real power if you can
Packaging wattage is often… optimistic.
If you have access to a basic power supply or a meter, verify:
- voltage
- current
Then estimate actual power draw. This helps you compare products honestly and also gives you early warning signs of a driver that doesn’t behave consistently.
3) Inspect build quality like you’re buying something that will vibrate for years
Motorcycles punish weak construction.
Before installing, look for:
- loose parts
- thin wires
- cheap connectors
- rough machining
- weak strain relief
If it feels flimsy in your hand, it will feel worse after a month of vibration.
4) Heat testing: the unsexy step that predicts lifespan
LEDs don’t “run cool.” They move heat. Poor heat handling causes:
- early dimming
- faster light decay
- shortened driver lifespan
A practical test:
- run the light for an extended period (not 30 seconds)
- feel the housing temperature (carefully)
- note if brightness changes after warming up
If it gets screaming hot fast, treat that as a durability warning.
5) Installation and fit: don’t buy an upgrade that forces you to cut your bike
Aim for installs that:
- don’t require modifying stock structure
- allow the dust boot/cap to seal properly
- don’t pinch wires or stress connectors
A bulb that “almost fits” is the beginning of a long, annoying story.
6) Beam pattern is the difference between “upgrade” and “glare”
This is the part that separates thoughtful riders from impulse buyers.
You’re not just lighting the road—you’re sharing the road. A bulb that sprays light everywhere may look impressive to you and miserable to everyone else.
Headlight Projector Lens Bulbs: Why “Built-In Lens” LEDs Can Be the Best Middle Ground
Now to the option that’s quietly won a lot of riders over: the bulb that includes its own small optical control—often described as a headlight projector lens style bulb.
If you’ve seen bulbs marketed as having a built-in lens or mini-projector, the appeal is simple:
- You get more focused output than typical multi-sided LED bulbs
- You often get a cleaner beam without swapping the entire headlight assembly
- It’s usually a true “replace the bulb” job, not a full headlight surgery
Why this matters in the real world
Many stock headlights rely heavily on the reflector bowl to shape the beam. When you install a multi-sided LED bulb (2-sided, 4-sided, 6-sided, 8-sided), the light source geometry can mismatch the original design.
Result: scatter.
And scatter has a social consequence: oncoming drivers get angry. Not because you “upgraded,” but because your beam pattern is now uncontrolled.
A built-in lens bulb tries to reduce that mismatch by controlling and shaping the light at the source. When done well, it can deliver a more concentrated beam that feels genuinely useful.
A rider’s caution (because the market is messy)
Not all projector-lens bulbs are good. Some are just regular LEDs with a decorative lens. The proof is always the same:
- Does the beam pattern look controlled?
- Does it stay stable after heat soak?
- Does it fit and seal properly?
Projector Headlights for Bikes: Upgrade Paths That Don’t Turn Into Regret
A lot of riders jump straight to a full projector assembly because the photos look incredible. Sometimes that works. Sometimes it becomes a two-month headache.
Here’s a practical upgrade strategy that avoids common traps.
Path A: Replace halogen with a quality LED bulb (lowest risk, best convenience)
This is ideal when:
- you commute
- you want minimal downtime
- your stock housing is decent
- you want a noticeable improvement without major changes
Path B: Use a headlight projector lens bulb (often the best value-to-effort ratio)
This is ideal when:
- you want better focus/beam control
- you don’t want to gamble on full assembly sealing
- you care about glare and beam discipline
- you prefer “swap and go” installations
Path C: Full projector assembly (highest potential, highest risk if quality is poor)
This is ideal when:
- you have a reputable assembly source
- you can verify sealing and mounting quality
- you’re willing to spend time aiming and checking fitment
- your routes truly justify the extra effort
A rider I know did Path C right after buying his first Suzuki. He ordered a projector assembly online, installed it with enthusiasm… and about two months later it started coming apart—adhesive issues, then water ingress, then fogging. It wasn’t just disappointing; it was risky. Night riding with a fogged headlight is like wearing glasses someone breathed on and never wiped.
That’s the lesson: a full assembly can be fantastic, but a mediocre one can turn into a reliability problem.
The “Don’t Be That Guy” Section: Why Multi-Sided LED Bulbs Can Make Oncoming Traffic Hate You
This deserves its own section because it’s one of the most common upgrade mistakes.
Multi-sided LED bulbs can look impressive in listings because they create a huge glowing area. But in many stock headlight bowls, they often:
- throw light upward
- create random hotspots
- reduce usable distance clarity
- increase glare
And yes—oncoming traffic will react. If you’ve ever been flashed repeatedly after an upgrade, that’s your warning sign. You didn’t “win the brightness game.” You accidentally became the problem.
This is why so many riders end up moving toward projector headlights for bikes or at least a headlight projector lens bulb: not to flex brightness, but to get a beam shape that behaves.
Installation Notes That Feel Boring Until They Save You
Even a perfect bulb can fail in real life because motorcycles are harsh environments.
Keep sealing intact
If your rubber boot/dust cap doesn’t seal properly after the swap:
- moisture gets in
- fogging happens
- corrosion follows
A headlight should be boringly sealed. “Almost sealed” becomes “why is my light cloudy?” surprisingly fast.
Aim the light after any change
A new bulb can change beam placement. Take five minutes and aim it.
Good upgrades feel professional not because they’re expensive, but because they’re aimed correctly.
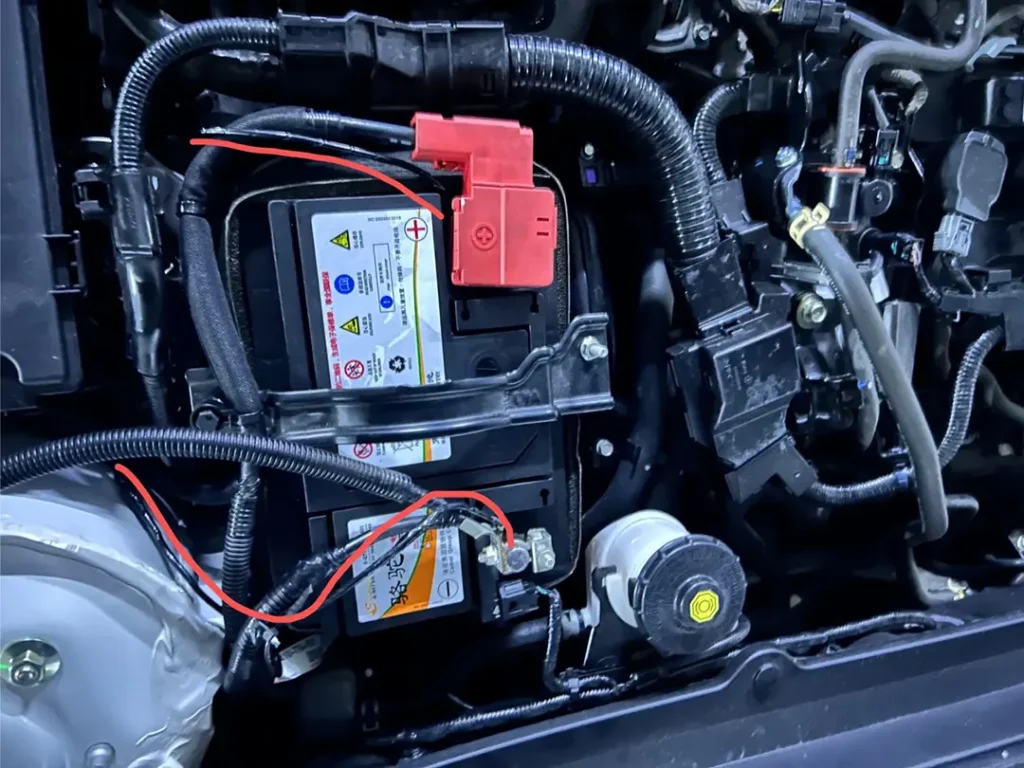
Watch for electrical weak points
If your old headlight looked like it was shorting:
- inspect connectors for heat damage
- check grounds
- look for loose terminals
Sometimes “my bulb is dim” is actually “my connector is cooked.”
Final Takeaway: Pick the Headlight That Matches Your Life, Then Validate It Like a Rider (Not a Shopper)
If you’re choosing a motorcycle headlight today, you’re not choosing between “bright” and “dim.” You’re choosing between:
- a simple, reliable setup (halogen),
- high-output but more complex systems (HID),
- efficient modern options with wildly different quality (LED),
- and optics-driven control via projector headlights for bikes or a headlight projector lens approach.
The most practical advice is also the least glamorous:
- Start with your riding conditions.
- Choose a setup that installs cleanly and seals properly.
- Validate real power, heat behavior, and beam pattern.
- Aim it so you can see—and so other people can still see too.
That’s how you end up with a headlight upgrade that feels like something a careful rider wrote about: calm, effective, and drama-free—rather than a bright mistake you have to fix later.