t started the way most “small upgrades” start: with a night drive that shouldn’t have been stressful.
A friend and I were coming back from a late dinner. The road wasn’t dangerous, just poorly lit—patchy streetlights, a few reflective signs, and the kind of oncoming traffic that makes you squint even when you swear you’re not getting older. I realized I wasn’t tired. I was just… working too hard to see.
Next morning, I did what any reasonable adult does: I opened my phone, searched headlight upgrades, and fell into the rabbit hole of beam patterns, color temperatures, and people arguing about glare like it’s a moral issue.
By lunchtime I had three messages waiting in my inbox—because my little “I’m just researching” turned into a group project:
- My cousin with a Swift: “Bro, if you’re doing it, I’m doing it. Mine is useless in rain.”
- A neighbor with a Baleno: “If it doesn’t look OEM, I’m out.”
- A gym buddy with an EcoSport: “I go out of town a lot. I want distance. Real distance.”
Three cars, three personalities, one weekend, and a shared goal: make the road clearer without turning ourselves into rolling hazards.
The plan: one workshop, three cars, and a “no-glare” rule
Before we touched a screwdriver, we agreed on one rule that solved 80% of the usual headlight-upgrade drama:
If it creates glare for others, it’s not an upgrade.
That meant we weren’t going to do the cheap “LED bulb in a reflector housing” trick. It’s tempting because it’s fast and looks bright when you stare at it, but it often throws light everywhere except where you need it—like a loudspeaker that’s impressive only because it’s pointed at your face.
So we booked a reputable retrofit shop for Saturday and did our homework Friday night.
What we wanted (and what we didn’t)
- We wanted: a clean cutoff, even spread, usable distance, and a setup that can survive summer heat.
- We didn’t want: dashboard errors, moisture in the headlamp, random flickering, or that “blue laser” look that makes wet roads worse.
I brought a notebook because I’m that person. The shop guy laughed, then stopped laughing when he realized I was actually writing down aiming measurements.
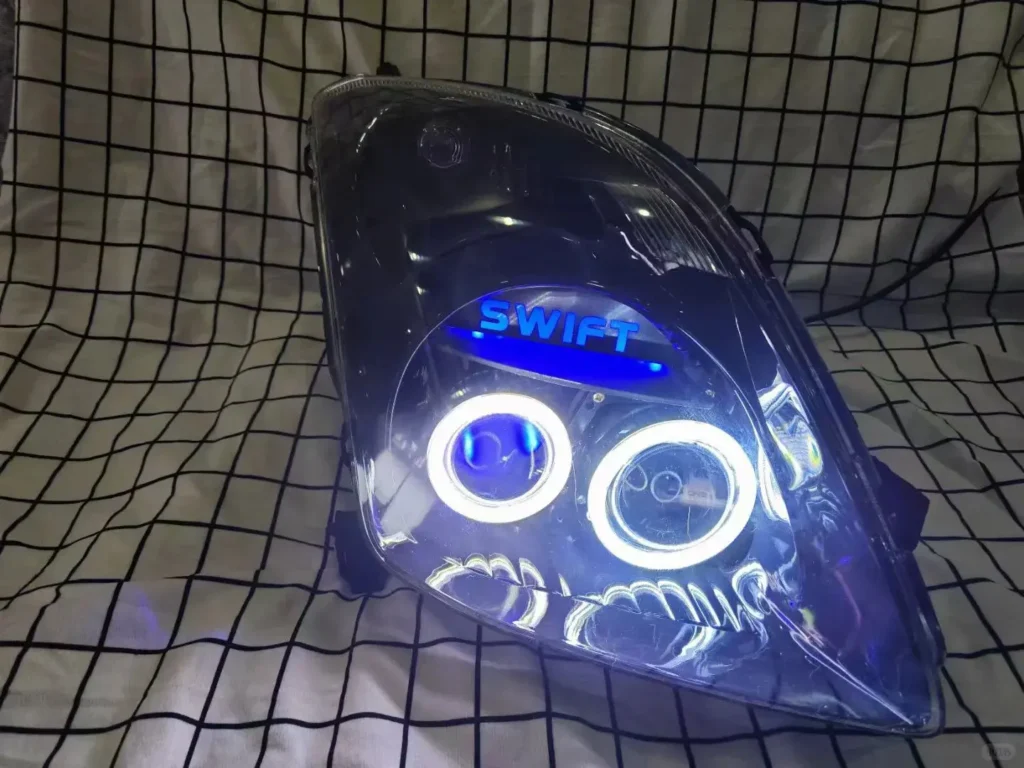
swift projector headlight: The “city car that deserves better than candles”
The Swift showed up first, cheerful and innocent, like it had no idea we were about to open its face.
My cousin’s complaint was simple: in the city it was tolerable, but on darker roads it felt like the light stopped five meters ahead. The beams were there, technically. They just weren’t helpful.
Why the Swift upgrade needed restraint (not maximum brightness)
For small hatchbacks, a common mistake is overcompensating: people chase high color temperature or raw brightness, and the result looks flashy but performs poorly in dust, rain, or fog.
The shop guy explained it in the simplest way I’ve heard:
“You don’t need the sun. You need control.”
So for the Swift, the focus became:
- A projector that creates a sharp, stable cutoff
- A sane color temperature (clean white, not blue)
- Good heat management so output stays consistent
The moment the headlamp opened
I expected it to look complicated. It looked… vulnerable. Like the headlamp was a sealed ecosystem and we were violating it.
The tech softened the sealant, separated the lens, and laid everything out neatly. That’s when I understood why retrofit quality varies so wildly: resealing and alignment are crafts, not just steps.
The first test on the aiming wall
When they powered up the new setup (still on the bench), the cutoff line appeared—crisp, level, and calm. Not “bright chaos.” It looked like the beam had manners.
My cousin, who had spent the morning calling his old headlights “two fireflies,” went silent for a second and said:
“Okay… that’s illegal-looking.”
It wasn’t illegal. It was just what proper optics look like.
Swift takeaway
If you’re upgrading a Swift, don’t chase drama. Chase:
- clean cutoff
- even spread
- stable output over time
A well-aimed projector makes the car feel more confident at night without screaming for attention.
baleno projector headlight: The “I want OEM look” upgrade (and why that’s the smartest request)
The Baleno owner is the kind of guy who wipes fingerprints off glossy piano-black trim. He wanted better lighting, but he also wanted it to look like the car shipped that way.
His biggest fear wasn’t brightness—it was regret.
Why OEM-style matters more than people admit
An OEM-style result usually means:
- projector centered properly
- no rattles or misalignment
- clean wiring
- proper sealing (no condensation)
- beam pattern that doesn’t annoy oncoming traffic
In other words, “OEM look” is often code for OEM discipline.
Choosing a setup that doesn’t shout
We avoided anything that would look like a science project behind the lens. The shop recommended a projector size that sat naturally within the housing, and a color temperature that matched modern factory LEDs.
No purple tint. No blue. Just a clean white that makes road markings pop.
The Baleno’s surprising problem: alignment sensitivity
Here’s something I didn’t expect: the Baleno’s headlamp housing was less forgiving than the Swift’s. Tiny alignment differences showed up clearly on the wall.
The tech did a few micro-adjustments and explained why it matters:
- A projector can be “good,” but if it’s rotated slightly, the cutoff tilts.
- If the cutoff tilts, you either blind someone or lose your own distance.
- Bad rotation is the kind of mistake you notice only after the car is reassembled—when fixing it becomes painful.
This is where the “human” part of retrofit matters. It wasn’t just install-and-go. It was measure, adjust, lock, recheck.
The night test drive
We took the Baleno down a familiar road with patchy lighting. The difference wasn’t only brightness—it was less stress.
The beam filled the lane evenly, and reflective signs didn’t explode into glare. It felt like the car had upgraded its eyes, not put on sunglasses.
Baleno takeaway
If you care about OEM vibe, you’re not being picky—you’re being practical. For a Baleno:
- prioritize fitment and alignment
- avoid overly blue color temperatures
- insist on proper resealing
The best compliment is when someone rides with you and doesn’t notice the headlights—until they realize how relaxed the drive feels.

ecosport projector headlight: The “I need distance” build for real highway nights
The EcoSport arrived with the most serious use case: out-of-town drives, darker highways, occasional rain, and long hours behind the wheel.
The owner didn’t want “cool.” He wanted usable reach.
The EcoSport reality: height changes everything
Because the EcoSport sits higher than a Swift or Baleno, aiming becomes even more important. A higher mounting point can create more glare if the beam is sloppy or mis-aimed.
So the shop insisted on two things:
- precise cutoff alignment
- correct final aiming with load conditions in mind
And yes, we had the classic moment of “aim it a bit higher, please,” followed by the tech giving us the look every good tech gives:
The nope look.
He explained it gently: if you raise low beam too much, you don’t actually see better. You just push light into oncoming drivers’ eyes and into reflective haze. Real distance comes from optics and focus, not from pointing the beam at the sky.
The EcoSport bench test: focused, not scattered
What impressed me was how the hotspot formed: not a bright blob, but a controlled concentration where the road needs it.
On the wall, it looked like the beam had layers:
- a clean cutoff at the top
- a strong center area for distance
- wide fill for peripheral visibility
That’s what highway driving needs—information, not glare.
The “rain check” conversation
The EcoSport owner asked the question everyone asks eventually:
“Should we go higher Kelvin? It looks brighter.”
The tech gave the best answer:
- Higher Kelvin can look visually striking
- But it can reduce contrast in rain/fog
- A clean white often performs better than a blue-white
So we stuck with performance over fashion. The EcoSport guy pretended to be disappointed for two seconds and then immediately started talking about how he can finally see lane markings.
EcoSport takeaway
For an EcoSport, the upgrade should be designed like a tool:
- strong distance + wide fill
- strict aiming to prevent glare
- stable heat management for long runs
If you drive highways at night, a good projector setup feels less like “bright headlights” and more like having extra reaction time.
What we learned the hard way: the small details that decide whether a retrofit is “great” or “regrettable”
By Sunday, all three cars were done, and I had a list of lessons that felt suspiciously like advice I wish I’d read earlier.
1) A projector upgrade is 50% optics, 50% installation
A great projector installed poorly becomes a mediocre headlight with extra steps.
Watch for:
- proper bracket/mount stability (no vibration)
- correct rotation (level cutoff)
- clean wiring and secure connectors
- careful resealing
2) Sealing isn’t optional—it’s the difference between “upgrade” and “aquarium”
If moisture gets inside:
- output drops
- lens fogs
- reflectors and internals can degrade
A shop that rushes resealing is a shop you shouldn’t trust with your night vision.
3) Aiming is the final product
People treat aiming like a courtesy. It’s not. It’s the actual deliverable.
A good shop will:
- aim low beams to spec
- verify cutoff level
- test on-road
- adjust after a short drive if needed
4) “Looks bright” isn’t the same as “helps you see”
You want:
- clear lane illumination
- readable road texture
- controlled top edge (cutoff)
- minimal glare
If a beam splashes everywhere, your eyes work harder, not less.
The Sunday night drive: three cars, one road, and the same reaction
We did a final group drive—Swift in front, Baleno in the middle, EcoSport behind—because apparently we’re the kind of people who turn lighting into a parade.
On a darker stretch, we swapped positions and compared. The differences were real:
- The Swift felt transformed in the city and on medium-speed roads.
- The Baleno looked the most factory-clean and “finished.”
- The EcoSport delivered the most confident highway reach.
But the shared improvement was the same: less strain. Less guessing where the lane ends. Less surprise potholes. Less white-knuckle focus.
At one point, my cousin said something that sounded dramatic but was true:
“I didn’t realize how tired bad headlights were making me.”
That’s the real value. Not flexing brightness. Not chasing trends. Just making night driving feel normal again.
Practical checklist (the part you’ll thank yourself for later)
Before you retrofit
- Decide your goal: city comfort, OEM look, or highway distance
- Avoid “LED bulb swap” in reflector housings if glare control matters (it does)
- Choose a shop that shows aiming and sealing discipline
During install
- Confirm projector rotation (level cutoff)
- Ask how they reseal and how long curing takes
- Ensure wiring is secure and protected
After install
- Do an aiming check with the car at normal load
- Test on a familiar dark road
- Recheck after a week for any condensation
Closing note: Why these three keywords belong in the same story
The Swift, Baleno, and EcoSport are different cars, but the upgrade logic is the same:
Good light is controlled light.
A clean cutoff, stable thermal design, careful sealing, and proper aiming beat “raw brightness” every day of the week—especially when it’s raining, when you’re tired, and when the road is doing its best to surprise you.
If you treat the retrofit like a lighting system (not a bulb), the result feels less like a mod and more like the car finally getting the headlights it always deserved.