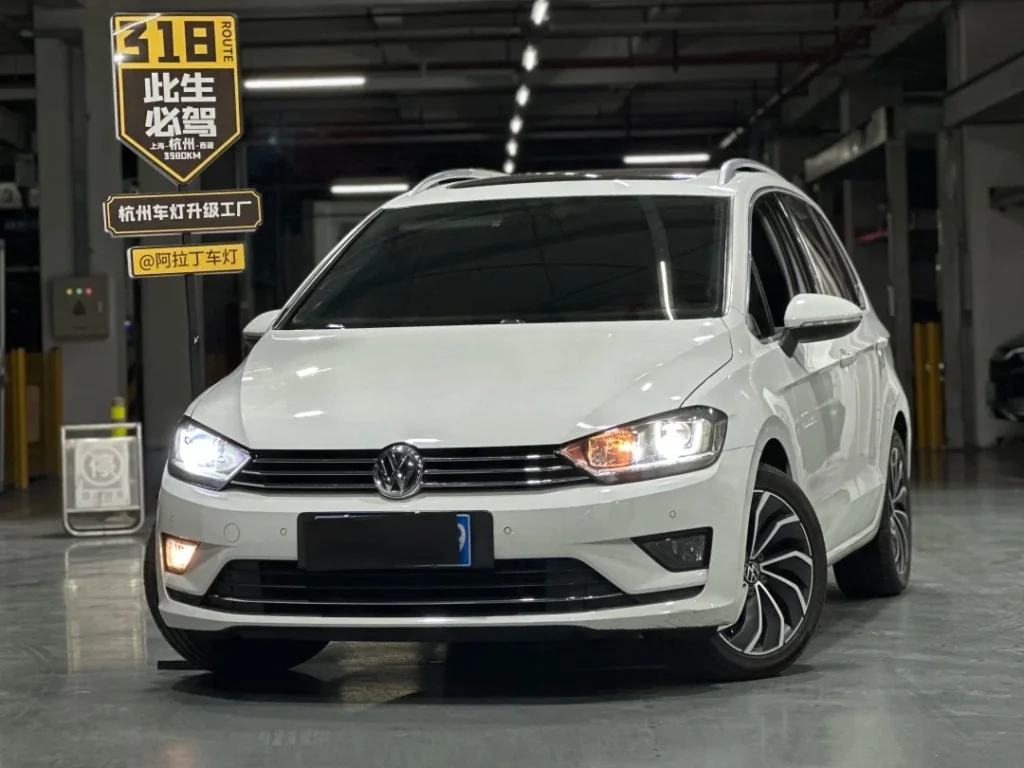
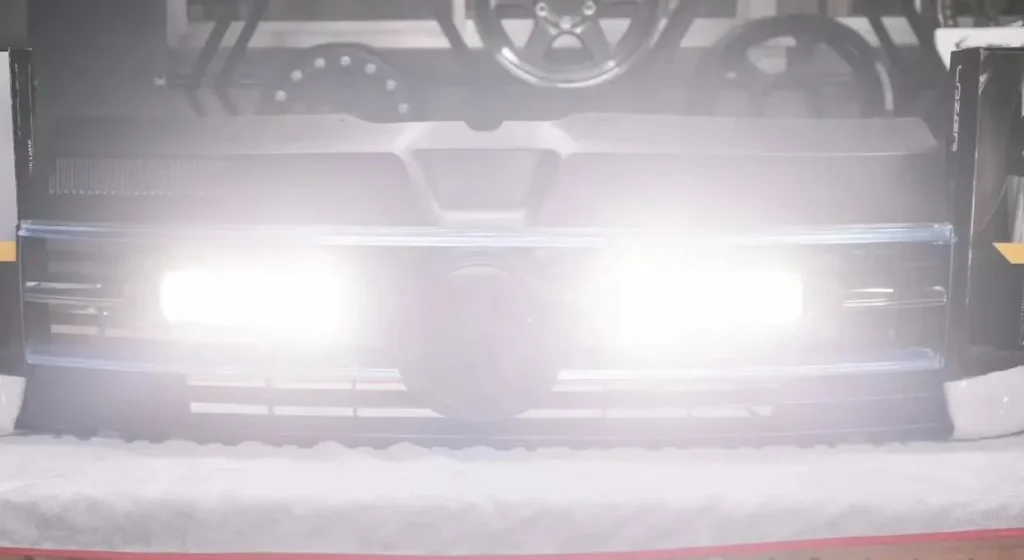
Eine Vielzahl von Auto-Grillleuchten installs look great in photos and slightly wrong in real life.
Not “bad wiring” wrong. Not “broken” wrong. Just… harsh. Too sharp. Too bright in a way that feels cheap. Or they light up the grille itself more than anything else, so the front end turns into a bunch of Reflexionen instead of a clean signature.
That’s not a brand problem as much as it’s a light choice and placement problem.
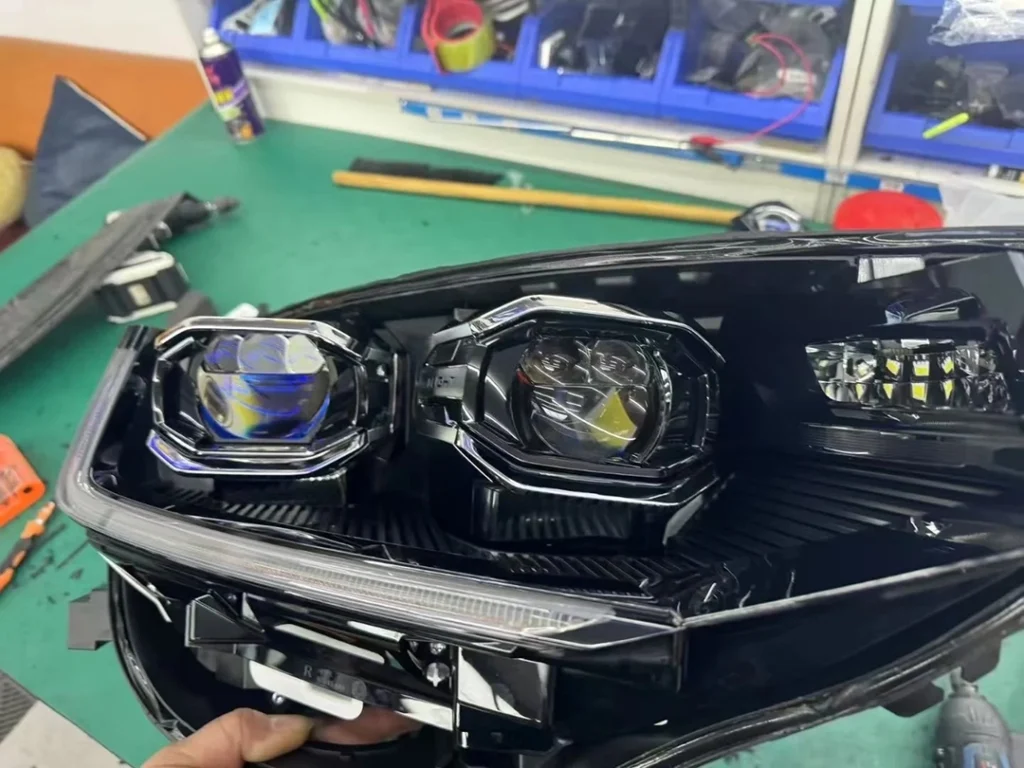
This article is about the visual side of led grill leuchten—color, beam, reflections, and how to keep the look crisp without being that person who’s blasting everyone with Blendung. No wiring tutorial, no troubleshooting flowchart. Just the stuff that decides whether your grille lighting looks “factory-plus” or “aftermarket chaos.”
The Big Misunderstanding: Bright Doesn’t Automatically Mean Better
With grille lighting, you’re not mounting a light in the same place as a headlight or fog light. You’re putting output in a spot that sits:
- higher than most fog lights
- closer to other drivers’ line of sight
- surrounded by glossy trim, chrome, badges, and grille surfaces that love to reflect
So if you buy the brightest option and aim it like it’s a work light, you’ll get a lot of light—but not a lot of clean presence.
A better goal is simple: make the vehicle easier to notice without looking aggressive or sloppy.
That usually comes down to three things:
- color (white vs amber)
- beam behavior (focused vs scattered)
- reflection control (what your grille is doing with the light)
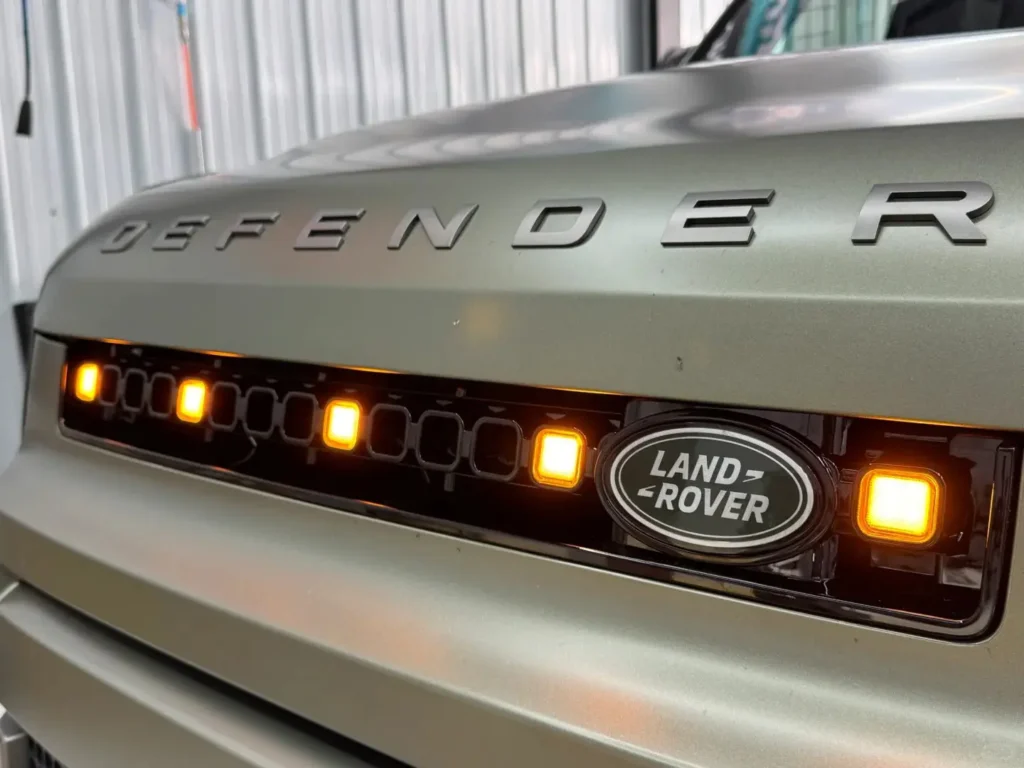
White vs Amber: What Changes in the Real World
People argue about white vs amber like it’s a personality test. In practice, both can work. They just do different jobs.
White: “clean” and modern—easy to overdo
White Auto-Grillleuchten can look sharp, especially on newer vehicles with modern headlight signatures. They tend to photograph well and match DRLs visually.
Where white can go wrong:
- in rain or mist, the scene can look “washed”
- on glossy black trim or chrome, reflections get intense fast
- if the output is too cool/blue, it can look cheap and harsh
White works best when the output is controlled and the aim is conservative.
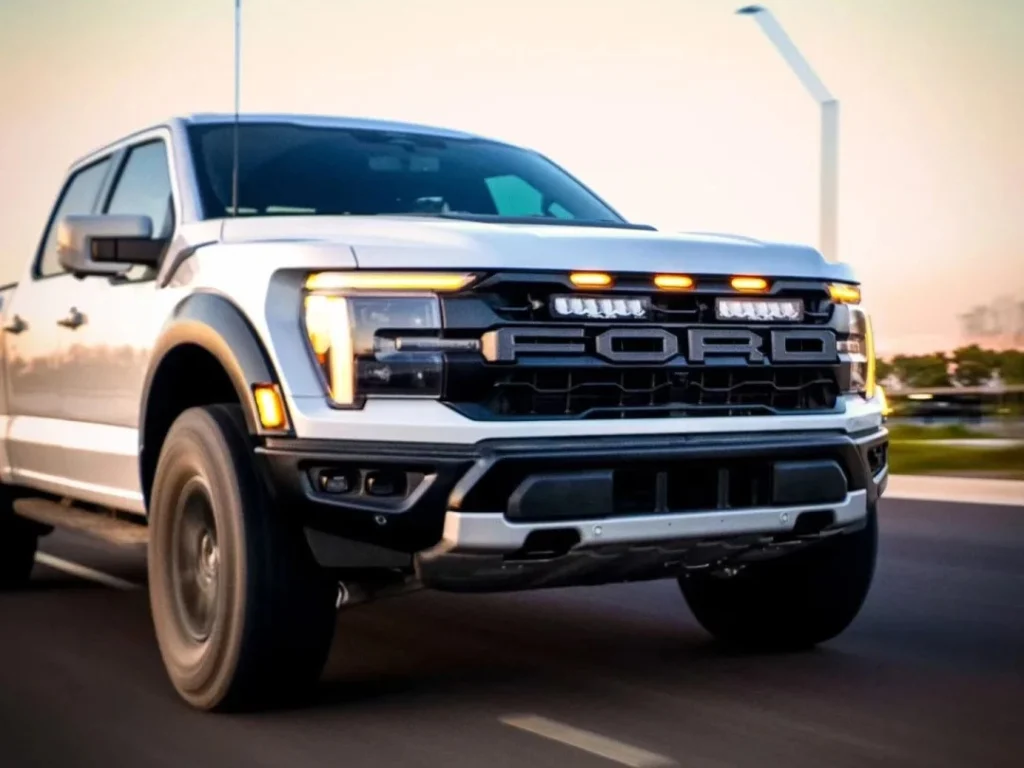
Amber: more contrast in messy weather, more “presence”
Amber (or warm yellow/amber) tends to read as “signal” rather than “headlight.” That’s why it’s popular for:
- bad weather visibility
- off-road convoy presence
- worksite situations
- builds that want a rugged look without looking like a strobe rig
Where amber can go wrong:
- some setups look too “marker light” if the placement is random
- cheap amber can look muddy instead of warm
- if you pair amber with lots of other warm lighting, the front end can look cluttered
Amber works best when the layout is symmetrical and the brightness is appropriate for the environment.
The honest takeaway:
If you want a clean daily-driver look, white is easier to blend into modern styling—but it requires more glare discipline. If you want functional presence in rough conditions, amber is hard to beat—especially when your grille has reflective trim.
Color Temperature (CCT): The Range That Looks “Expensive” vs “Cheap”
This is where marketing gets loud, so let’s keep it practical.
For white led grill leuchten, the “looks clean” zone is usually around:
- neutral white to cool white, without going blue
When white looks cheap:
- it skews blue/purple
- it creates hard glare edges
- it turns chrome into a mirror flare
Also: camera footage lies. Phones love to exaggerate blue-white and overexpose bright points. So don’t pick color based on the most dramatic TikTok clip you’ve seen.
If your vehicle has:
- chrome grille elements
- a large shiny emblem
- glossy piano-black trim
…leaning slightly less “icy” often looks more premium in person.
Beam Behavior: The Secret to “Clean” Grill Lighting
Two lights can be the same color and brightness and still look completely different because of beam behavior.
Think in these terms:
A focused, controlled output looks intentional
A tight beam or well-controlled optic can create a clean signature: you see the light source clearly, but it doesn’t spray everywhere.
This is what makes grille lighting feel “designed,” not improvised.
A scattered, wide spill looks messy
If the output floods across the grille, you’ll get:
- light bouncing off grille bars
- flare off chrome edges
- hotspots that look uneven from different angles
- a front end that looks “busy”
For grille lighting, controlled output usually wins—even if it’s not the brightest.
Glare: The Fastest Way to Ruin an Otherwise Nice Setup
Glare isn’t just “too bright.” It’s brightness in the wrong place.
Mit Auto-Grillleuchten, glare happens when:
- the modules are angled upward
- the output is too direct toward oncoming traffic
- the mounting position is too high and centered
- reflections multiply the brightness (chrome, gloss, badges)
A simple aiming rule that helps
If you’re using grille lighting for presence (not forward illumination), there’s rarely a reason to aim it up. Keep it level or slightly down. If you can see the LED source painfully from a normal standing height in front of the vehicle, it’s probably too direct.
The cleanest setups don’t scream. They show up.
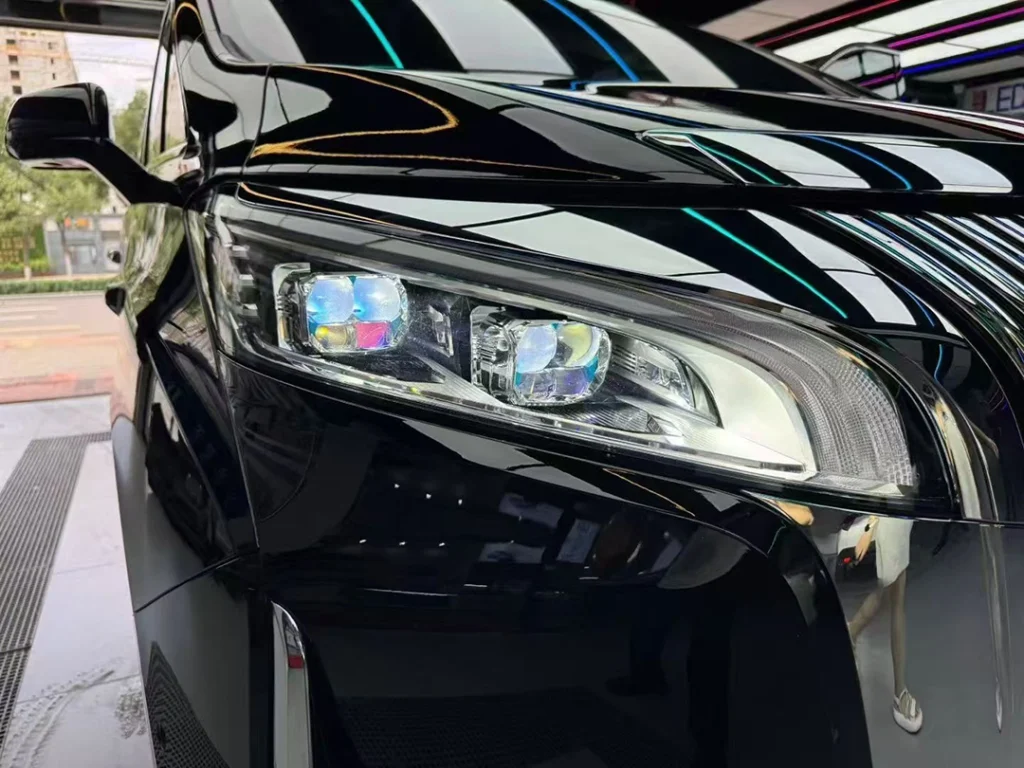
Reflections: Chrome and Gloss Can Make Good Lights Look Bad
This is the part people underestimate until they turn the lights on.
Chrome doesn’t “softly reflect.” It throws light back. Gloss black can do the same, just darker and more patchy. Badges and emblems can create a bright halo or weird glare spot right where people’s eyes naturally land.
A few practical ways to avoid the reflection mess:
1) Don’t mount directly facing a reflective surface
If the module points straight into a chrome bar, you’ll see the bar more than the light.
Small changes in angle can make a huge difference here.
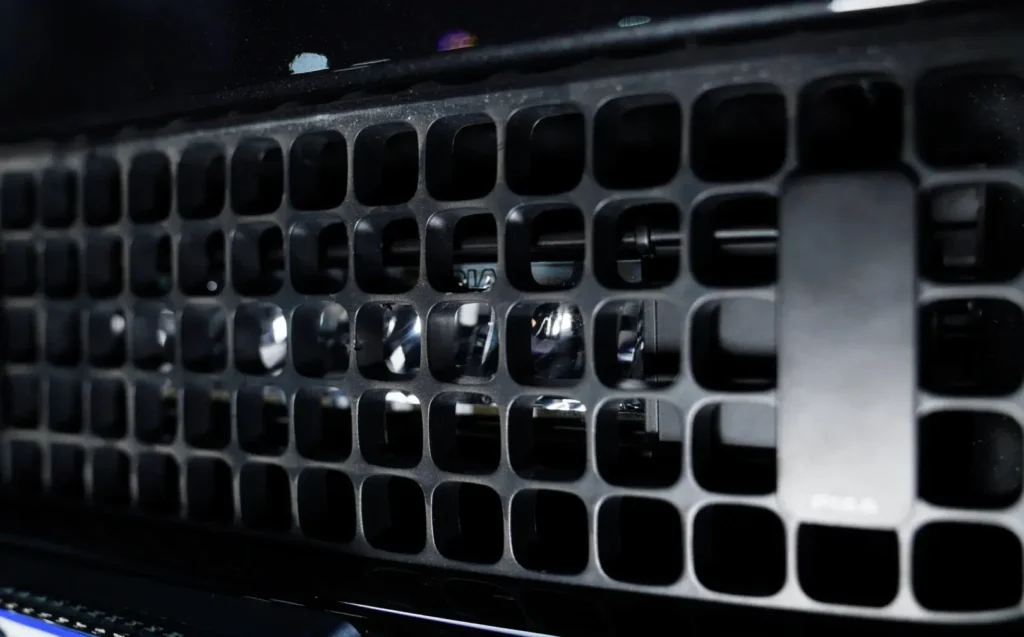
2) Use the grille openings, not the grille surfaces
A clean install places lights so the output exits through openings instead of washing across the plastic.
3) Check the look from multiple heights
A setup can look clean at your eye level but glare at sedan-driver height. Step back and squat a little—seriously. You’ll see what other drivers see.
Layout: Why Some Grille Lighting Looks “Factory” Even When It Isn’t
A lot of the “premium” look is just geometry.
Symmetry is everything
If you’re running multiple modules, keep:
- equal spacing
- equal height
- equal distance from the grille centerline
Even small asymmetry becomes obvious because the vehicle itself is symmetrical. People notice without knowing why.
Fewer lights, placed better, usually looks more expensive
Four well-placed modules often look cleaner than eight crammed into the center.
If you’re chasing a refined look, prioritize:
- consistent spacing
- alignment with existing grille lines
- leaving some negative space
Weather Reality: What Looks Fine in Dry Air Can Look Harsh in Rain
If your driving includes rain, mist, snow, or dust, the air itself becomes a reflector. Light scatters back toward your eyes and toward oncoming traffic.
That’s one reason amber can feel “easier” in messy conditions: it often reads as presence without looking like an extra headlight.
For white led grill leuchten, controlling glare matters even more in bad weather. The cleaner your beam and the more conservative your aim, the better it will feel when the air turns reflective.
Choosing the Look You Actually Want (Not the Look That Just Performs Online)
Here are three common goals and what usually works for each:
Goal A: “OEM-plus” daily driver
- neutral-to-cool white, not blue
- controlled output
- conservative aiming
- minimal reflection
This is where people fall in love with their setup long-term.
Goal B: Rugged presence for off-road / convoy
- amber works extremely well
- symmetry matters more than “maximum brightness”
- avoid washing the entire grille (it gets chaotic in dust)
Goal C: Worksite / visibility-first
- amber or warm tones often communicate “caution” better
- avoid aggressive flash patterns for normal road use
- choose a layout that’s readable at angles (not only straight-on)
(Mode and control habits are a separate topic—we’ll keep this article focused on the look.)
How to Photograph Grill Lights Honestly (So Customers Don’t Feel Tricked)
If you’re creating content around Auto-Grillleuchten, this matters for trust.
Bad photos make everything look either:
- ridiculously bright (overexposed), or
- disappointingly dim (auto-exposure compensates)
A simple approach:
- lock exposure if your phone allows it
- include a reference (parking lights or a streetlight)
- shoot one clip at normal exposure and one close-up detail shot
- avoid long exposure that turns the lights into giant blobs
Honest visuals reduce returns and “this isn’t what I expected” complaints.
Final Thought: Clean Grille Lighting Is Mostly Discipline
Great led grill leuchten aren’t just about LED chips. They’re about restraint:
- pick a color that matches the job
- choose output that doesn’t scatter everywhere
- aim it to avoid glare
- respect reflective trim
- keep the layout simple and symmetrical
Do that, and your Auto-Grillleuchten won’t just look good in a photo—they’ll look good every night you drive.