Headlight upgrades are one of those mods that sound “simple” until you’ve actually driven a dark road with tired eyes and oncoming traffic flashing you back. At Leding, we see the same story repeat in different cars: factory halogen reflector headlights feel dim, owners try a quick bulb swap, and the result is often worse—glare, scattered light, and a beam pattern that makes everyone unhappy.
This post pulls together two practical retrofit stories—polo projector headlights et ecosport projector headlight—and then zooms out to talk about the one we haven’t built yet: the i20 projector headlight angle. Not as a fictional “case,” but as a driver-first way to decide what’s worth doing, what to avoid, and what “good light” actually feels like behind the wheel.
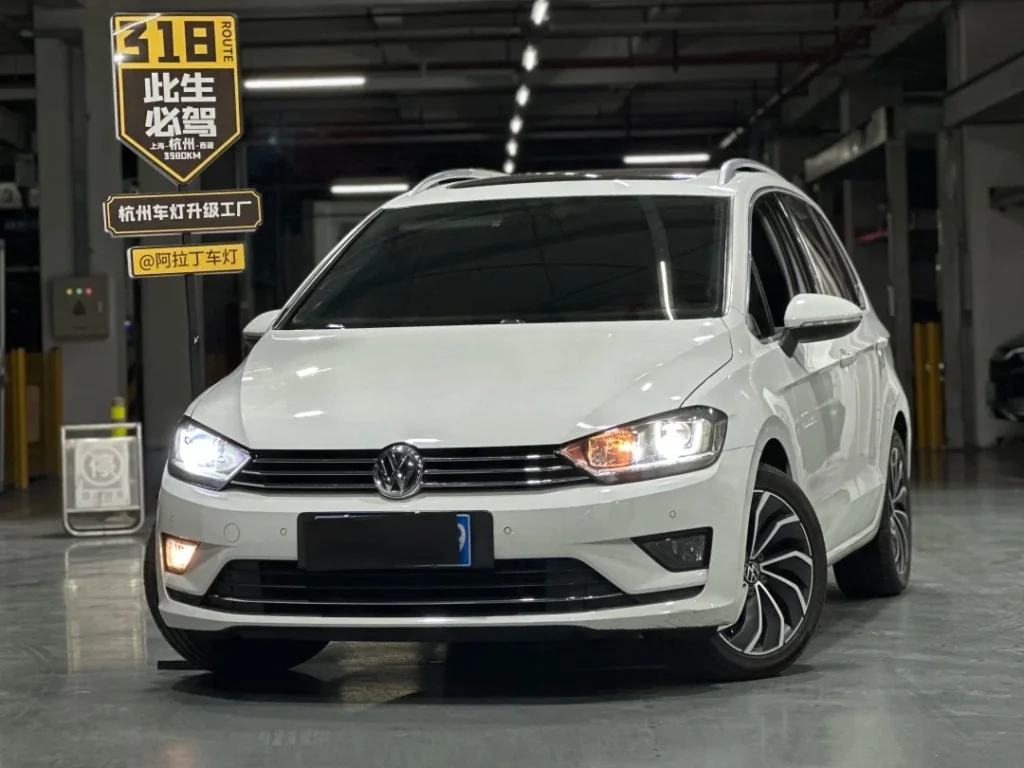
polo projector headlights: From “yellow and empty” halogens to a proper bi-beam projector
A POLO owner reached out with a complaint we hear constantly: the factory halogen setup looked dull and lifeless, and night driving had become stressful. City streets with decent lighting were manageable, but longer drives meant more squinting, more fatigue, and that creeping feeling that you’re out-driving your headlights.
The common mistake: HID bulbs in a halogen reflector
Before coming to our Leding store, the owner had already tried a “quick fix” at a local parts market: a pair of bare HID bulbs installed into the original reflector housing.
On paper, that sounds like “more brightness.” In reality, reflector optics designed for halogen filaments usually can’t control the arc light source correctly. The typical results:
- More glare, less usable road illumination
- Scattered light (it looks bright to others, not to you)
- Unstable or floating high beam performance
- Increased chance of oncoming drivers flashing vous
- Sometimes accelerated wear on the headlight lens (heat/UV and poor fitment don’t help)
The owner’s description was painfully honest: the headlights became so harsh that staring at them for a second could leave you seeing spots—funny in hindsight, not funny on a two-lane road.
The Leding solution: a bi-beam projector retrofit
We booked the POLO in for a proper upgrade: Leding bi-beam projectors (dual-function low + high beam). The point of a projector isn’t just “brighter.” It’s controlled brightness.
With a quality projector setup, you’re aiming for:
- A defined cutoff line on low beam (to reduce glare)
- A wider, more even spread close to the car (so you can actually see edges and hazards)
- A high beam that’s centered and confident, not “searching” into the sky
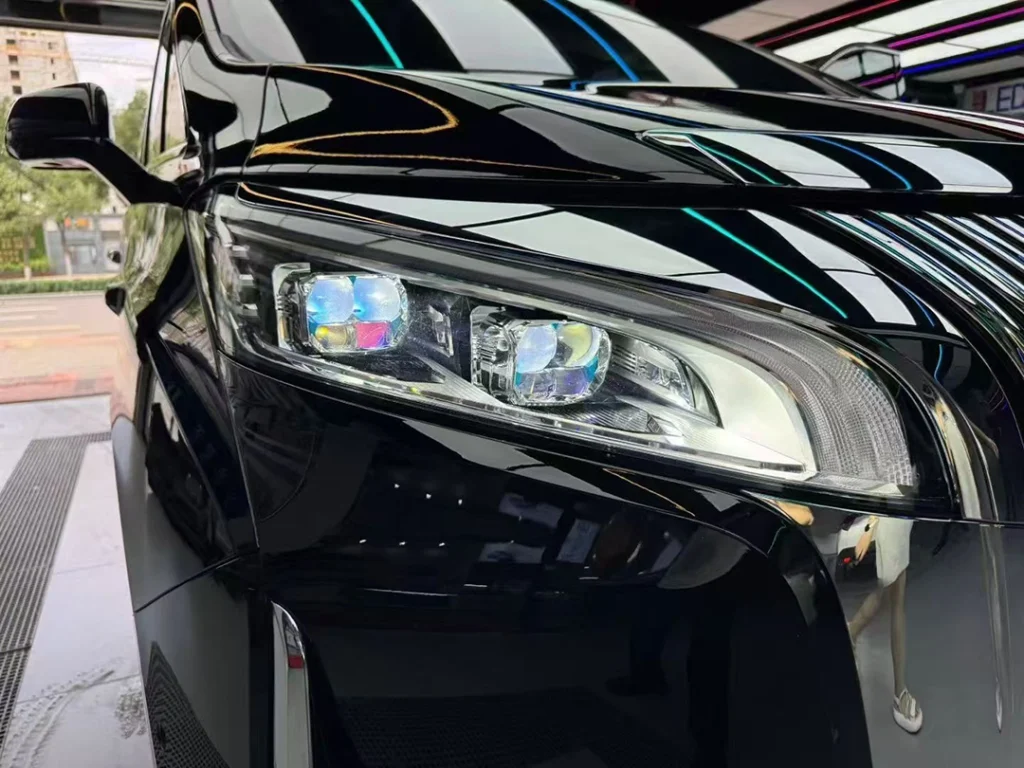
What changed visually (even before driving)
Once the retrofit was completed, the owner’s first reaction wasn’t about lumens—it was about character. The headlight looked “awake.” Projectors tend to give the front end more presence, like the car suddenly gained focus.
That “OEM-plus” vibe matters more than people admit. A headlight should look intentional, not like it’s trying to start an argument with traffic.
Low beam results: clean, bright, and usable
After the upgrade, low beam performance delivered the big three:
- Brightness: reported as more than 3× improvement in perceived output
- Road coverage: better foreground and lane-width illumination
- Discipline d'arrêt: a left-low/right-high pattern that helps visibility without punishing oncoming drivers
In real driving terms, this usually translates to: less eye strain, fewer surprises at the road edge, and a calmer driving posture. You stop “hunting” for the road and start scanning it.
High beam results: reach and structure
High beam improvement wasn’t just “more light.” It was better structured light—wide, far, and stable.
For drivers who do any rural driving, this is the point where they notice the biggest emotional difference: you no longer feel like the dark is “winning.”
Quick note on the photo set
This POLO job didn’t capture every mid-process photo due to a busy day in the shop—completely understandable in the real world. What matters is the before/after beam performance and the final fit-and-finish.
ecosport projector headlight: Why this Ford owner chose LED projectors over a “simple xenon swap”
This EcoSport owner bought the car back in 2014 and lived with halogens for years. In the city, streetlights did most of the work. But once the route turned into darker suburban roads or countryside lanes, the factory halogens felt underpowered: dim, unfocused, and confidence-draining.
Like many owners, the first thought was “xenon.” The second thought—after seeing what some shops do—was “maybe not.”
Why “just swap HID bulbs” can be risky (and disappointing)
The owner visited multiple retrofit shops and noticed a pattern: some offered HID bulb swaps without proper hardware or with questionable wiring practices. The concern wasn’t only performance. It was safety and reliability.
Common issues with low-quality conversions:
- Poor beam control → glare and reduced effective visibility
- Questionable electrical work → flickering, failures, and worst-case hazards
- Mismatched optics → bright hotspots with dark dead zones
That’s how this EcoSport ended up choosing a Leding projector-based solution, aligned with where modern OEM lighting has been heading for years: controlled optics with efficient light sources.
Why LED projectors made sense for this build
The owner laid out a practical list of LED pros and cons—exactly how a real buyer thinks, not how an ad reads.
Perceived advantages of LED headlight systems:
- Efficiency: lower power draw than halogens
- Long service life: the owner quoted ~30,000 hours for Leding LEDs (in practical terms, this often outlasts the vehicle’s life for many drivers)
- Instant-on response: no warm-up delay
- 12V low-voltage operation: less anxiety than high-voltage HID systems
- Higher usable brightness: especially when paired with proper optics
Realistic drawbacks to acknowledge:
- Heat management is critical: poor cooling shortens lifespan dramatically
- Low-end LEDs can disappoint (bad color, bad output, bad beam)
- Some drivers feel HID throws farther—sometimes true depending on setup
- Upfront cost can be higher than cheap bulb swaps
The key is that this wasn’t a “LED is magic” decision. It was a “good optics + good components” decision.
What the installation experience looked like (from the owner’s point of view)
This case had more of an “in-shop diary” feel, and it’s valuable because it shows what a proper job involves.
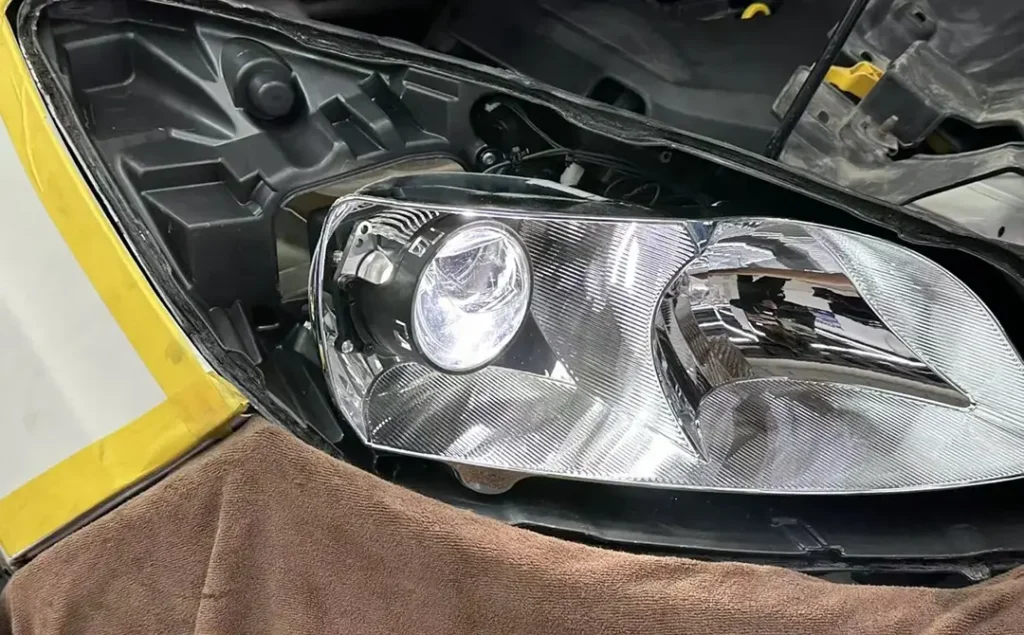
Step 1: Baseline check (the “before” reality)
Before opening anything, the owner saw the original low beam pattern: dim and not well focused. That’s the baseline many drivers tolerate—until they drive a road that doesn’t tolerate them back.
Step 2: Disassembly and heating (because headlights are sealed)
The team removed the rear covers and bulbs, prepped the housings, and heated the headlight to open it safely.
A useful detail here: the EcoSport used a cold glue sealant, which typically requires longer heating time than some hot-glue sealed lamps. That’s the kind of vehicle-specific nuance that separates “it fits” from “it lasts.”
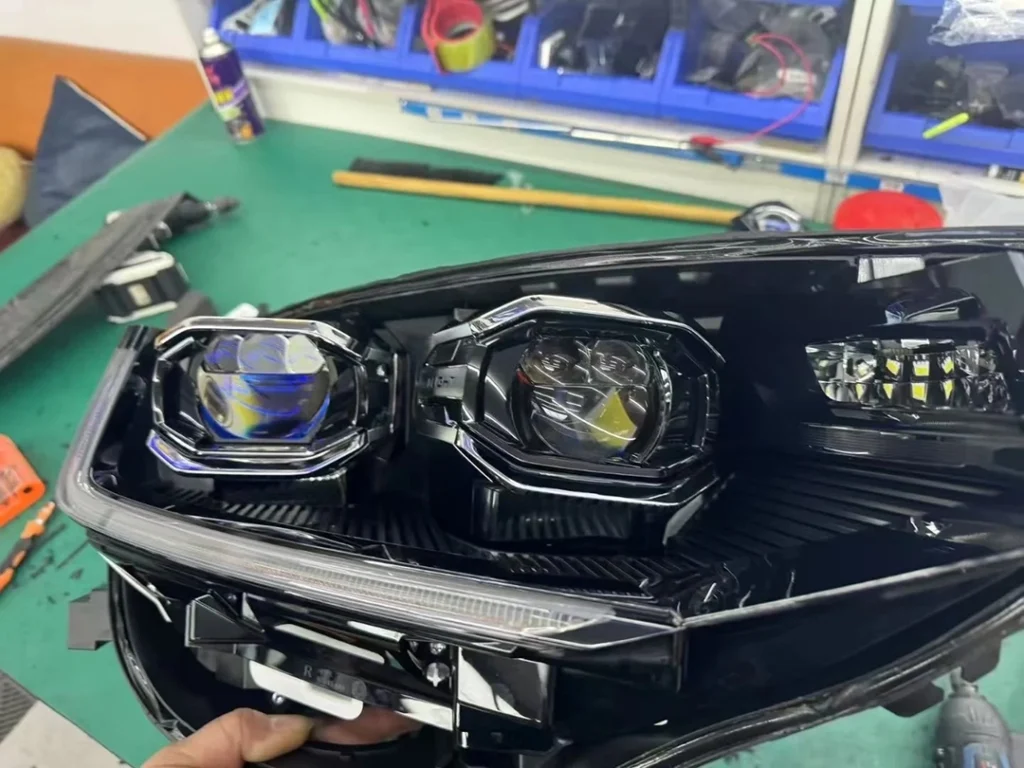
Step 3: Projector fitting and alignment (the part that actually matters)
This is where beam quality is won or lost:
- Positioning the projector correctly
- Cutting/modifying the reflector bowl as needed
- Cleaning dust and debris thoroughly
- Securing components so they don’t shift over time
The owner even mentioned the emotional moment of seeing the reflector bowl cut (“that hurt a little”). That’s normal. But it’s also the reality of doing the job properly.
Step 4: Sealing and reinforcement
After installation:
- The lens was resealed using heat glue
- Extra reinforcement (like staples/pins) was added for long-term security
- The lights were tested on the car and aimed
A retrofit is only as good as its seal. Condensation is the quickest way to turn “upgrade” into regret.
The driving result: “shockingly bright” low beam and a confident high beam
The owner’s reaction to the test wall pattern was immediate: low beam brightness was startling—in a good way. High beam became more concentrated and powerful.
On the road, the improvement usually shows up as:
- More visible lane edges
- Less black “void” between hotspots
- Better mid-distance clarity
- Reduced fatigue on longer night drives
And, yes, a subtle bonus: the car looks newer.
i20 projector headlight: How the upgrade should feel (even if you haven’t built this one yet)
You mentioned one i20 hasn’t been retrofitted yet. That’s totally fine—and honestly, it’s a chance to write something more useful than a generic “install story.”
Because for an i20 owner, the real question isn’t “can I install a projector?” It’s:
- What problem am I solving?
- What will I feel after the upgrade?
- How do I avoid glare and wasted money?
The “after” feeling you’re actually buying
When an i20 goes from halogen reflector lighting to a properly tuned projector setup, the best upgrades don’t feel like “brighter.” They feel like plus clair.
Drivers typically notice:
- Less eye strain: you’re no longer forcing focus into dim, yellow haze
- More relaxed speed control: you stop hesitating because you can see farther sooner
- Cleaner decision-making: pedestrians, scooters, potholes, and road edges appear earlier
- Less social friction: fewer flashes from oncoming traffic when the cutoff is correct
That last one is underrated. A good beam pattern is polite. It gives you visibility without stealing someone else’s.
What to avoid on an i20 (the same trap as the POLO)
If the i20 is factory reflector-halogen, the biggest trap is still the same:
- Don’t rely on “brighter bulbs” alone (LED/HID) and expect a miracle
- If the optics can’t shape the light, you’ll get glare and disappointment
A proper i20 projector headlight direction is about pairing a projector optic with a stable light source and solid sealing/aiming.
What Leding would prioritize in an i20 build
If we were planning this i20 retrofit as a clean, repeatable package, the priorities would be:
- Beam pattern first: cutoff sharpness, width, and uniformity
- Gestion thermique: LED performance depends on it
- Sealing quality: no fogging, no leaks
- Road-legal aiming discipline: the best hardware still needs correct alignment
That’s also how you keep the “OEM-plus” look: strong output, zero chaos.
What these three keywords have in common: optics beat “bulb hacks”
It’s tempting to treat headlights like home lighting: swap a bulb, get more light. Cars don’t work that way because the optical system is integrated.
Here’s the practical takeaway from these builds:
Why a projector retrofit works (and bulb swaps often don’t)
- Projectors control light with a cutoff shield and focused lens system
- Reflectors designed for halogen filaments don’t know what to do with HID arcs or many LED chip geometries
- Better control = more usable road illumination with less glare
What “3× brighter” usually means in real life
Even when owners say “3× brighter,” the most meaningful improvement is typically:
- Better distribution (width and evenness)
- Better contraste (you can separate objects from background)
- Better range in high beam without losing structure
Leding retrofit notes: what makes a clean job last
A lot of headlight write-ups focus on the product and ignore the craft. But these cases highlight the real checklist.
Installation fundamentals (the unglamorous essentials)
- Correct heating/opening technique (model-specific sealant behavior matters)
- Precise projector positioning and secure mounting
- Dust control before resealing
- Reliable sealing method and reinforcement
- Proper aiming after installation
A quick “good driver” reminder
A well-aimed projector setup is safer for everyone. You get the visibility you need, and oncoming drivers keep theirs. That’s not just courtesy—it’s how you avoid attention you don’t want.
Closing thoughts: the best headlight upgrade is the one you stop thinking about
The POLO owner wanted relief from dim, yellow, stressful lighting—and learned the hard way that “more intense bulbs” can make visibility worse. The EcoSport owner approached the upgrade with a practical mindset and ended up with a modern-feeling beam pattern that matched how today’s cars are built. And for the i20, the smartest path is clear: focus on optics, heat management, sealing, and aiming—because the point isn’t to look bright in photos. It’s to drive comfortably on the kind of roads where headlights actually matter.
Leding’s philosophy is simple: build light you can use, not light that starts arguments.