Recently, many car owners have asked me the same question: how do you fix dark spots in LED projector headlights? After dealing with many real-world cases, I’ve found that these dark areas are usually caused by issues such as projector installation errors, poor bulb compatibility, optical contamination, or unstable power supply. Today, I’ll explain the problem from a professional perspective and walk you through the most effective solutions.
1. Check the Projector Installation Accuracy
In an LED projector headlight system, the projector lens is the core component responsible for focusing and shaping the beam pattern. Based on years of experience, around 80% of dark spot issues are caused by projector misalignment or improper installation.
First, check whether the projector is fully aligned with the mounting base. If the projector is offset by more than 0.5 mm, the beam pattern may develop visible dark zones. It is also important to verify that the projector optical axis is properly calibrated. Using a level to align the projector can help ensure the light output remains even and properly focused. In professional installation, keeping the projector at the correct reference angle is essential for avoiding beam distortion.
Even a small installation error can lead to uneven light distribution, reduced focus, and obvious shadow areas on the road.
2. Inspect the Compatibility Between the Light Source and the Projector
Although the system is a projector headlight, the light source itself must still be properly matched to the projector structure. Different LED light sources may have different emitting point positions, and if they do not match the projector design, the beam pattern will become uneven.
In many cases I’ve seen, the chance of dark spots appearing after replacing components with non-original or poorly matched parts is very high. The emitting point of the LED light source should align closely with the original design position. Ideally, the deviation should stay within ±1 mm. Otherwise, the projector cannot focus the light correctly, resulting in black shadows, scattered output, or weak hotspots.
For this reason, it is always better to choose LED projector headlight components specifically designed for the vehicle model or for the projector system being used.
3. Clean Dust, Moisture, and Oxidation Inside the Headlight Assembly
Another common cause of dark spots in LED projector headlights is contamination inside the headlight assembly. Dust, moisture, or oxidation can interfere with the optical path and reduce beam clarity.
Dust or water vapor inside the housing can scatter the light and create localized dark areas. As a maintenance reference, the headlight sealing condition should be checked every 20,000 kilometers. If you notice condensation or fog inside the lens cover, the headlight assembly should be disassembled and dried thoroughly.
In addition, oxidation on the projector lens surface can reduce light transmission. Using a professional polishing solution can often restore over 90% of the lens transparency, significantly improving beam output and reducing shadowing.
4. Adjust the Headlight Height and Projection Angle
Some dark spot issues are not caused by the projector itself, but by incorrect headlight aiming. If the projection angle is too high or too low, the beam may appear to have dark sections even when the optical components are working normally.
For example, when the vehicle is heavily loaded, the rear suspension drops and the front end lifts slightly. This can cause the low beam to aim too high, while the high beam develops an apparent dark area in the effective illumination zone.
To avoid this, headlight adjustment should be performed when the vehicle is unloaded. As a general reference, the center point of the low beam should be approximately 75–80 cm above the ground, while the high beam should remain parallel to the ground. Proper beam alignment is essential for maintaining a clear and uniform lighting pattern.
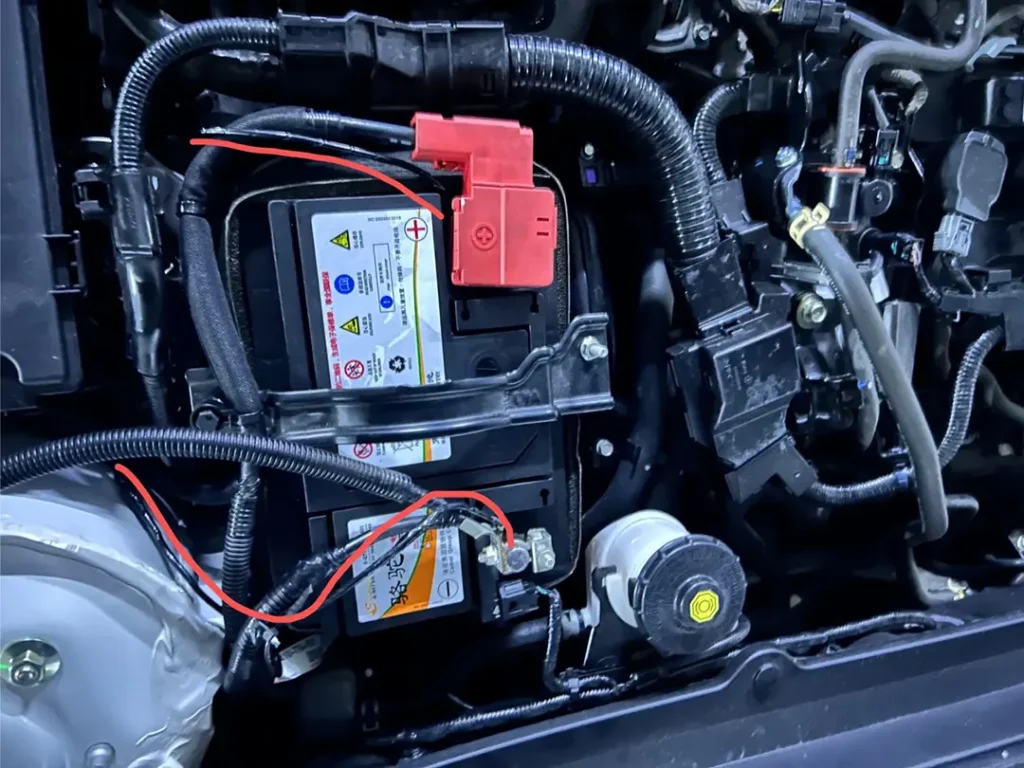
5. Check the Wiring and Power Supply Stability
LED projector headlights require a stable power supply to maintain consistent brightness and beam quality. If there is a loose connection, poor grounding, or voltage fluctuation in the wiring system, the light output may become unstable and create uneven illumination.
Use a multimeter to test the voltage at the headlight connector. Under normal conditions, the voltage should remain between 13.5 V and 14.5 V. If the reading falls below 13 V, you should inspect the alternator output and all related wiring connections.
Insufficient or unstable voltage can prevent the LED module from operating at full and consistent brightness, which may result in visible dark patches or irregular beam performance.
Final Thoughts
To solve dark spots in LED projector headlights, you need to approach the issue from both an optical dan electrical perspective. In most cases, the troubleshooting process should begin with:
- projector installation accuracy
- light source and projector compatibility
- internal dust, moisture, or lens oxidation
- headlight aiming angle
- wiring and voltage stability
From my experience, installation precision and component matching should always be checked first. If the problem cannot be solved through basic adjustment, it is best to visit a professional retrofit or repair shop for a full inspection. Incorrect handling may cause further damage to the headlight system.