Quick take (for skimmers)
Tacoma grille lights are easy to buy and surprisingly easy to install badly. The most common mistake isn’t wiring—it’s buying modules that don’t physically fit the depth behind your grille, or placing them where the grille chops the light into messy “broken” hotspots.
Why Tacomas are “friendly” for lampu grille (and where they bite back)
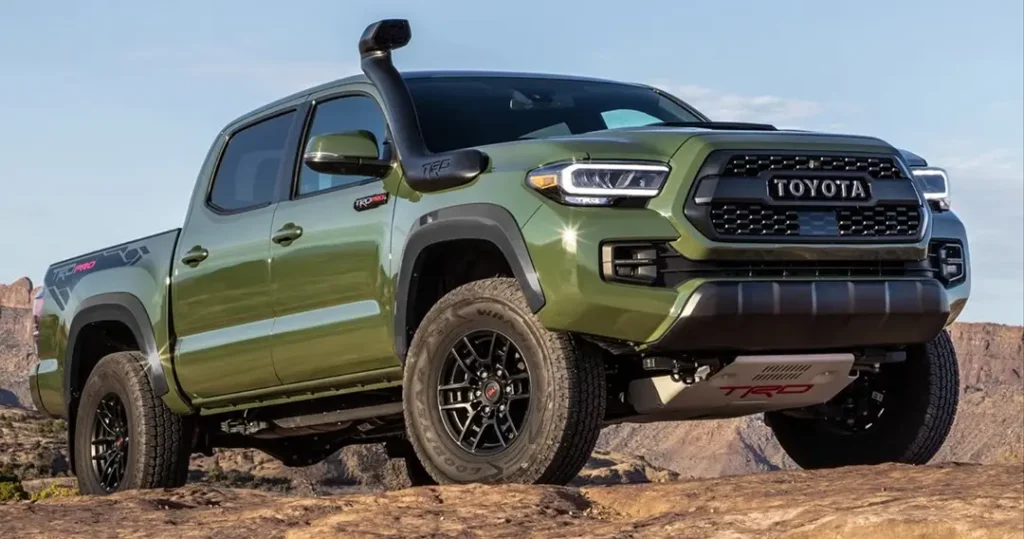
The Tacoma front end is a sweet spot for grille lighting: lots of grille area, a strong symmetrical face, and a big aftermarket culture that normalizes tasteful front accents.
But Tacomas also have a few realities that cause headaches:
- Depth behind the grille can be tighter than it looks.
The light body fits, then the connector doesn’t. - Grille geometry can fragment the output.
You end up with scattered bright bits instead of a clean row. - Certain zones are just not worth fighting.
Even if you can mount there, you’ll hate it later (maintenance, airflow, sensor sensitivity).
This article is a layout and fitment guide, not a wiring tutorial.
Start with the three-zone approach (it prevents most bad installs)
Instead of “Where should I mount?” ask “Which zone am I working in?”
Zone A: Clean openings (best visual result)
These are areas where the grille opening is large enough that the light reads as one intentional module.
Why Zone A wins:
- the output isn’t chopped into pieces
- fewer reflections
- easier to align and keep looking OEM
Zone B: Mixed geometry (works, but can look messy)
Here the opening pattern can split the light, creating multiple hotspots. It can still look fine if you’re disciplined about placement and count.
Make it work by:
- using fewer modules
- placing them where the opening is most consistent
- avoiding glossy surfaces directly in front
Zone C: Sensitive/annoying zones (avoid)
This isn’t about “it’s impossible.” It’s about “you’ll regret it.”
Zone C usually includes:
- areas you can’t access later without major disassembly
- areas that compromise airflow or sit in high-splash pockets
- areas near sensor hardware that you shouldn’t crowd
Layout options that look good on a Tacoma (without trying too hard)
Tacoma owners often overestimate how many lights they need because the grille is large. Bigger grille doesn’t automatically mean “add more.”
Option 1: 2-module layout (subtle, clean, hard to mess up)
This reads like a gentle OEM marker accent.
Terbaik untuk:
- daily drivers
- people who want “you notice it if you notice it”
Option 2: 4-module layout (the Tacoma sweet spot)
Four modules can look very intentional on a Tacoma if you keep spacing consistent and pick openings that don’t fragment output.
Key requirement: true left-right symmetry.
Option 3: 6-module layout (works on the right grille, clutter on the wrong one)
Six can look sharp, but only if:
- the openings are uniform enough that each module looks “whole”
- you maintain identical height and angle across all six
If your grille geometry is busy, six lights can quickly read as visual noise.
The fitment check that saves the most returns: depth + connector bend
A lot of “doesn’t fit my Tacoma” returns are really: the module fits, the plug doesn’t.
Before buying (or before committing to a location), check:
- Module depth: how far the light body protrudes behind the grille
- Connector length: how far the plug sticks out
- Bend radius: how much space the wire needs to turn without stress
- Behind-grille obstacles: braces, ducts, shutters, radiator support contours
Practical method: pick your intended mounting spot and measure the “usable depth” behind it. Don’t measure the deepest point in the area—measure the depth at the exact spot you want the light to sit.
“Broken light effect”: when the grille pattern ruins the look
You’ve seen this: in daylight it looks fine, and at night it looks like scattered bright shards.
That’s usually the grille acting like a mask.
How to predict it in 30 seconds
- Look straight-on: do you see a clean window where the module will shine?
- Move 30 degrees left/right: does the opening disappear or split?
- Check for glossy edges that will reflect light back at you.
How to fix it (without changing the kit)
- shift the module slightly so more of the lens lines up with open area
- reduce count (4 clean beats 6 messy)
- avoid placing modules behind thick horizontal bars
Keep the Tacoma front end practical: airflow, service access, and “future you”
Most people think about how it looks today. The better installs consider how it lives for two years.
Airflow: don’t turn a cosmetic mod into a cooling compromise
You don’t need a CFD lab. Just avoid:
- packing solid objects into key intake paths
- blocking openings with brackets or excess wiring
Serviceability: can you reach it later?
You’ll eventually want to:
- re-tighten hardware
- clean behind the grille
- swap a module
- inspect connectors after a season
If your chosen spot requires major teardown for simple checks, pick a different spot.
Color and mode notes (short on purpose)
Color and flashing rules vary widely. In many regions:
- certain colors (especially blue/red) are restricted
- forward-facing flashing is restricted on public roads
If the kit includes strobe/flash, treat those as off-road/private property functions. Keep daily driving on steady modes and avoid glare.
FAQ
What’s the best Tacoma grille light layout for a clean look?
Four modules is the common sweet spot: symmetrical, visible, and not visually crowded—assuming your grille openings don’t fragment the output.
Why do some Tacoma grille lights look “broken” at night?
The grille pattern blocks parts of the lens and creates multiple hotspots. Placement and opening geometry matter as much as the lights themselves.
Do Tacoma grille lights fit all trims and years?
Fitment depends on the front-end structure and the usable depth behind the grille at your chosen mounting point. Always check depth plus connector bend space.