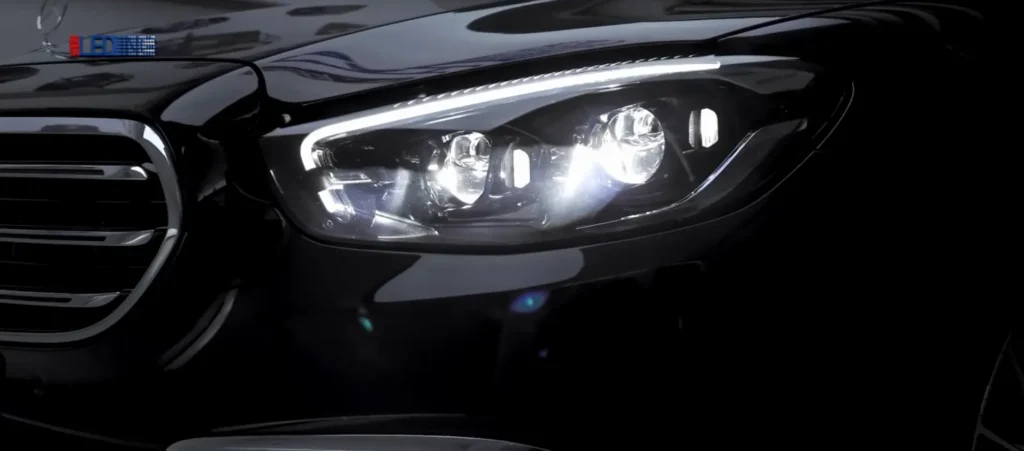
Meningkatkan lampu utama adalah salah satu pengubahsuaian yang mungkin terasa semata-mata untuk kecantikan—sehingga anda memandu di jalan gelap dan menyedari betapa banyak kawalan sinaran perubahan keselesaan, keselamatan, dan keyakinan. Di situlah bi lampu utama projektor Masuklah. Dilakukan dengan betul, sebuah moden lensa projektor lampu hadapan Setup bukan sekadar kelihatan “premium”; ia menghasilkan pemotongan yang lebih bersih, julat guna yang lebih luas, dan a pancaran tinggi yang sebenarnya sampai.
Di bawah adalah penjelasan praktikal yang mesra retrofit tentang bagaimana projektor bi-fungsi berfungsi, cara membezakan bi berbanding tunggal sekilas, apa yang penting apabila memilih LED atau HID sistem projektor, dan mengapa kuasa, reka bentuk “dual-bowl”, dan penyejukan boleh membuat (atau merosakkan) hasilnya.
Apa “Bi Projekter Lampu Hadapan”Sebenarnya Bermaksud (dalam Bahasa Inggeris Ringkas)
“bi” projektor adalah singkatan bagi dua fungsi: satu modul projektor mengendalikan kedua-dua pancaran rendah dan pancaran tinggi.
Di dalam projektor terdapat logam perisai pemutus (kadang-kadang dipanggil shutter). Dalam rangka rendah Dalam mod ini, perisai menghalang cahaya yang terangkat ke atas untuk membentuk garisan pemotongan yang tajam. Apabila anda bertukar ke sinaran tinggi, satu kecil elektromagnetik aktor (solenoid) gerakan yang menghalakan cahaya ke tepi supaya lebih banyak cahaya keluar di atas titik potong dan lebih jauh ke hadapan.
Titik utama: Lampu mentol atau pemancar LED biasanya tidak bergerak.. Projektor mengubah pancaran cahaya dengan menggerakkan perisai, bukan dengan memindahkan sumber cahaya.
Petua pengecaman pantas (berfungsi pada kebanyakan binaan)
Jika anda dapat mengesan satu solenoid dan mekanisme penutup bergerak pada projektor, ia biasanya dua fungsi. Jika ia tidak mempunyai solenoid/shutter, ia biasanya satu-sila (rendah sahaja atau tinggi sahaja).
Asas Lensa Projektor Lampu Hadapan: Mengapa Lensa Hanya Satu Bahagian
Orang sering memanggil keseluruhan modul itu “lensa,” tetapi lensa itu hanyalah tingkap hadapan bagi sistem optik. Projektor lengkap biasanya merangkumi:
- Mangkuk reflektor (atau ruang optik) untuk mengumpul dan mengarahkan cahaya
- Perisai pemotong untuk membentuk pancaran rendah
- A lensa projektor lampu hadapan cembung untuk memaparkan corak sinaran
- Sumber cahaya (HID kapsul, pemancar LED, dan lain-lain
- Pada unit dua fungsi: solenoid + shutter bergerak
Ini penting kerana prestasi projektor bukan sekadar “betapa jelas lensa kelihatan.” Ia adalah sejauh mana projektor itu berfungsi dengan baik. posisi pemancar, geometri reflektor, dan reka bentuk perisai berfungsi bersama untuk menghasilkan:
- Potongan yang bersih
- Pengedaran yang sekata (tiada tompok gelap yang pelik)
- Satu titik panas pusat yang kuat untuk jarak jauh
- Lebar bahu boleh guna untuk keselesaan dan pengesanan bahaya
Projektor Sinar Tunggal vs Dua Fungsi: Apa Yang Anda Dapatkan dalam Memandu Sebenar
Projektor sinaran tunggal biasa digunakan dalam sistem yang lebih lama atau sistem bajet, terutamanya unit sinaran rendah. Ia boleh berfungsi dengan baik, tetapi ramai pemandu menaik taraf kerana mereka mahukan corak sinaran yang lebih kuat dan lebih moden serta sinaran tinggi yang lebih berguna tanpa menambah perkakasan berasingan.
Penyinaran tunggal (rendah sahaja)
- Sering digandingkan dengan halogen atau HID dalam reka bentuk lama
- Bagus apabila direka dengan baik, tetapi terhad oleh perspektif “hanya satu tugas”
- Biasanya memerlukan reflektor/projektor sinaran tinggi berasingan di tempat lain.
Lampu utama bi-projekter (rendah + tinggi dalam satu)
- Satu modul mengendalikan kedua-dua pancaran.
- Sinaran tinggi dihasilkan dengan membuka shutter (lebih banyak cahaya di atas pemotong).
- Boleh mempermudah pembungkusan dalam penyesuaian semula dan memberikan penjajaran yang konsisten antara rendah/tinggi
Dalam amalan, projektor dua fungsi popular kerana ia meningkatkan “rasa harian” kereta: sinaran rendah menjadi lebih terkawal dan sekata, manakala sinaran tinggi menjadi lebih segera dan terpusat.
LED vs HID dalam Projektor Bi: Menyesuaikan Sumber Cahaya dengan Optik
Terdapat dua laluan biasa untuk lampu depan bi-projektor:
- Projektor HID bi-ksenon (projektor direka untuk kapsul HID + balast luaran)
- Modul projektor Bi-LED (Pemancar LED dan pemacu direka dalam projektor)
HID bi-ksenon: klasik “satu mentol, dua sinaran”
Susunan bi-ksenon menggunakan satu kapsul HID untuk kedua-dua sinaran. Penutup projektor mengendalikan pertukaran antara sinaran rendah dan tinggi.
Kekuatan
- Intensiti tinggi dan potensi jarak jauh
- Ekosistem matang (banyak corak projektor dan gaya pancaran)
Perkara yang perlu dirancang
- Ballast dan kerumitan pendawaian
- Tingkah laku pemanasan (HID meningkat secara berperingkat dan bukannya mencapai kemuncak serta-merta)
- Lebih banyak komponen untuk dipasang dengan selamat dan dilindungi daripada kelembapan
Proyektor Bi-LED: terintegrasi dan pantas
Modul Bi-LED biasanya menggabungkan pemancar LED, laluan terma (pendingin haba), dan reka bentuk pemacu untuk optik tersebut.
Kekuatan
- Tindak balas segera (sangat sesuai untuk kilatan sinar tinggi yang pantas dan pertukaran pantas)
- Pembungkusan yang lebih bersih—selalunya mempunyai lebih sedikit bahagian luaran berbanding HID
- Warna kekal stabil apabila sejuk dengan betul
Berhati-hati
- Pengurusan haba menentukan kestabilan keluaran dan kesihatan jangka panjang.
- Penyejukan yang tidak mencukupi boleh menyebabkan pembatasan termal (menggelap selepas beberapa minit), haus yang lebih cepat, atau peralihan warna
Jika anda mahukan peningkatan harian yang “set dan lupakan”, projektor Bi-LED yang direka dengan baik sering kali memberikan pengalaman pemilikan yang lebih lancar—dengan syarat sistem penyejukan dan kualiti pemandu modul tersebut mantap.
Memilih Kuasa untuk Projektor LED Bi: Mengapa “Lebih Besar” Tidak Semestinya Lebih Baik
Kuasa adalah topik besar dalam membeli projektor LED kerana mudah untuk membandingkan angka dan menganggap watt yang lebih tinggi bermakna pencahayaan yang lebih baik. Keputusan sebenar di dunia nyata lebih rumit.
Mengapa kuasa yang lebih tinggi boleh membantu (sehingga suatu tahap)
LED boleh menghasilkan lebih banyak cahaya dengan arus yang lebih tinggi, dan corak pancaran projektor sering kelihatan “penuh” hanya apabila sistem mencapai ambang kecerahan tertentu—terutamanya dalam penyebaran bidang dekat dan pengisian bahu.
Pemandu biasanya menyedari peningkatan apabila:
- Titik panas tengah cukup kuat untuk jarak jauh, dan
- Sebaran sekelilingnya cukup terang sehingga kelihatan licin, bukan bertompok-tompok.
Mengapa ramai pemasang mengehadkan sekitar julat yang munasabah
Garispanduan praktikal yang diikuti ramai peminat ialah mengelakkan watt yang melampau melainkan modul itu direka untuknya dan rumah lampu kepala mampu menahan haba.
Sasaran yang sering dibincangkan ialah tidak melebihi anggaran julat kuasa sederhana (selalunya sekitar 65W setiap modul) untuk pembungkusan retrofit biasa—kerana melebihi itu, haba meningkat dengan cepat dan keuntungan sebenar mungkin terhad oleh optik, bidikan, atau silau kawalan.
Intipatinya: pilih kuasa yang sistem penyejukan anda boleh kekalkan, bukan hanya apa yang kelihatan mengagumkan di atas kertas.
Pratayang Dual-Bowl (Dual-Cup): Apa yang mereka cuba perbaiki
Sesetengah projektor bi-LED menggunakan a dua-mangkuk (dua-cawan) struktur—pada dasarnya menambah satu struktur reflektif tambahan untuk menguatkan bahagian-bahagian tertentu pancaran, selalunya intensiti dan jarak pancaran tinggi.
Mengapa reka bentuk mangkuk berganda boleh menarik minat
- Sinaran tinggi boleh mendapatkan hentakan tengah yang lebih tertumpu
- Lemparan jarak jauh mungkin bertambah baik tanpa menjadikan pancaran terasa berserabut.
- Projektor itu boleh terasa lebih “lengkap” sebagai penyelesaian rendah/tinggi.
Walau bagaimanapun, dual-bowl tidak bersifat ajaib dengan sendirinya. Keputusan keseluruhan masih bergantung kepada:
- Ketepatan penempatan pemancar
- Geometri perisai
- Kualiti lensa dan penjajaran
- Reka bentuk termal dan kestabilan pemacu
Penyejukan Bukan Pilihan: Ia Asas Konsistensi Bi-LED
Jika ada satu spesifikasi “tidak menarik” yang paling penting bagi projektor Bi-LED, ia adalah pengurusan terma.
Apabila haba LED tidak dikawal, anda boleh melihat:
- Keluaran menurun selepas beberapa minit pertama (pembatasan terma)
- Penurunan lumen yang lebih pantas dari masa ke masa
- Perubahan warna secara beransur-ansur
- Risiko yang lebih tinggi kegagalan pemacu atau komponen
Modul Bi-LED yang kukuh berkelakuan konsisten: ia kelihatan hebat apabila anda menyalakannya buat pertama kali, dan ia masih kelihatan hebat selepas memandu sepanjang malam. Konsistensi itu sebahagian besarnya adalah kisah penyejukan.
Corak sinaran lebih penting daripada “kecerahan”: apa yang perlu dicari dalam ujian dinding
Ujian dinding pantas boleh mendedahkan sama ada susunan lensa projektor lampu hadapan berfungsi dengan baik.
Semakan geladak rendah
- Garis pemotongan: lurus, stabil, dan bersih
- Langkah (jika berkenaan): peralihan lancar tanpa gelombang pelik
- Penempatan hotspot: tepat di tengah dan tidak terlalu tinggi
- Lebar: Pengisian bahu yang mencukupi untuk mengurangkan penglihatan terowong
- Keseragaman: bintik-bintik minimum atau zon gelap
Semakan sinaran tinggi (dua fungsi)
- Sinar tinggi sebenar harus menambah jarak dan intensiti pusat, bukan sekadar menambah lebih banyak cahaya di mana-mana
- Peralihan daripada rendah ke tinggi harus terasa bermakna: jangkauan lebih jauh, keterlihatan lebih luas, pantulan tanda yang lebih jelas pada jarak jauh.
Nota tentang Gaya: Lensa Projektor 3D dan “Lampu Hadapan sebagai Identiti”
Setelah projektor menjadi biasa, lampu depan tidak lagi hanya untuk pencahayaan. Banyak kenderaan kini menggunakan elemen “lensa 3D” atau kesan projektor bermotif untuk menambah personaliti—foto, ikon, teks, atau reka bentuk bertema—menjadikan bahagian hadapan seolah-olah tandatangan.
Apakah susunan lensa 3D yang biasanya disasarkan
- Penampilan siang yang khas (sering dipadankan dengan tingkah laku DRL)
- Kesan “mata” yang mudah dikenali pada waktu malam
- Motif peribadi yang terasa secara unik terikat kepada pemiliknya
Dari sudut praktikal, peringatan penting itu mudah: Gaya tidak seharusnya menjejaskan kawalan sinaran.. Jika elemen hiasan menyebarkan cahaya, mengganggu pemotongan, atau menimbulkan silau, ia tidak berbaloi.
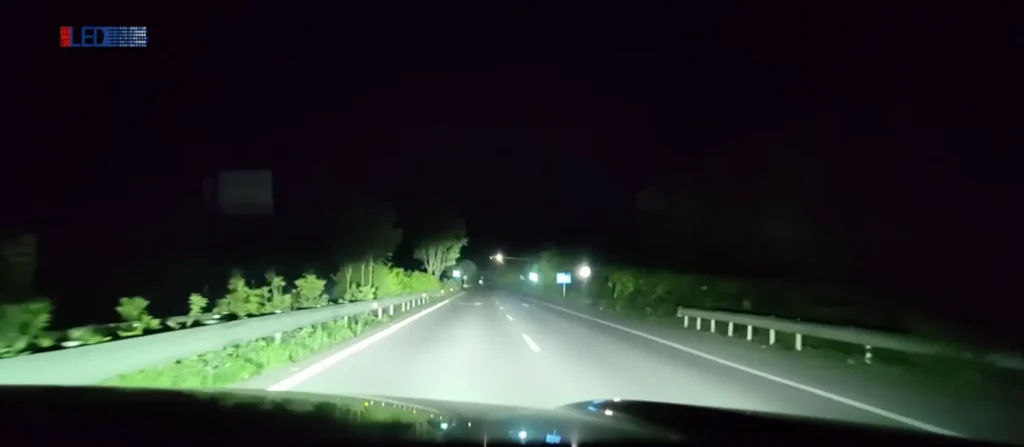
Manfaat Keselamatan Dunia Sebenar: Mengapa Jarak Menambah Masa Tindak Balas
Projektor yang lebih baik bukan sahaja kelihatan lebih tajam—ia juga boleh memanjangkan jarak penglihatan yang boleh digunakan. Jarak tambahan itu terus ditukar menjadi masa.
Satu contoh mudah: di 80 km/j, kenderaan itu bergerak kira-kira 22.2 meter sesaat. Jika peningkatan projektor secara berkesan menambah 100 meter daripada keterlihatan yang boleh digunakan, itu lebih kurang 4.5 saat masa tindak balas tambahan. Di lebuh raya yang gelap, saat-saat itu boleh menjadi perbezaan antara “elakan lancar” dan “pengbrekan panik secara tiba-tiba.”
(Keputusan tepat berbeza mengikut sasaran, keadaan jalan, dan corak sinaran, tetapi prinsipnya kekal: jarak terkawal membeli masa.)
Senarai Semak Pembelian: Cara Memilih Lampu Hadapan Bi Projector Tanpa Penyesalan
Apabila menilai peningkatan lampu utama bi-projector, fokuskan pada apa yang sebenarnya meramalkan kepuasan:
1) Kualiti optik dahulu, spesifikasi kemudian
- Potongan yang bersih dan penyebaran yang sekata
- Foto corak sinaran terbukti (bukan sekadar dakwaan kecerahan)
2) Pilih LED atau HID berdasarkan keutamaan anda
- Mengeutamakan pembungkusan yang lebih ringkas dan maklum balas segera: Bi-LED
- Memilih watak HID klasik dan tidak kisah dengan komponen tambahan: Bi-ksenon
3) Kuasa mesti sepadan dengan penyejukan dan ruang penampung
- Modul kelas 55–65W yang stabil dan kekal sejuk sering kali mengatasi susunan watt yang lebih tinggi yang membataskan kuasa atau merosot.
4) Pertimbangkan reka bentuk dua mangkuk jika prestasi sinaran tinggi paling penting
- Terutamanya jika anda memandu di jalan luar bandar dan mahukan lontaran tengah yang lebih.
5) Jangan mengabaikan “realiti pemasangan”
- Penyasaran yang tepat, pemasangan yang kukuh, dan penyusunan wayar yang kemas adalah bahagian prestasi.
- Pengedap dan kawalan kelembapan menentukan sama ada projektor anda kelihatan baik selama bertahun-tahun atau menjadi berkabus selepas satu musim.
Ringkasan Utama
Lampu projek Bi popular atas sebab tertentu: ia adalah salah satu cara paling cekap untuk mendapatkan pemotongan sinaran rendah yang kemas dan sinaran tinggi yang berfungsi daripada satu modul. Tetapi keputusan terbaik diperoleh apabila melayaninya sebagai sebahagian daripada sistem lengkap—optik, kuasa, penyejukan, dan pemasangan berfungsi bersama.
Pilih projektor dengan corak sinaran yang anda benar-benar suka, tentukan tahap kuasa yang sistem penyejukan anda mampu kekalkan, dan utamakan kestabilan berbanding sensasi. Begitulah cara anda mendapat pencahayaan yang benar-benar terasa seperti “kereta baru yang hebat,” bukan sekadar “lebih cerah pada hari pertama.”