Автомобильное освещение имеет забавный способ стать личным.
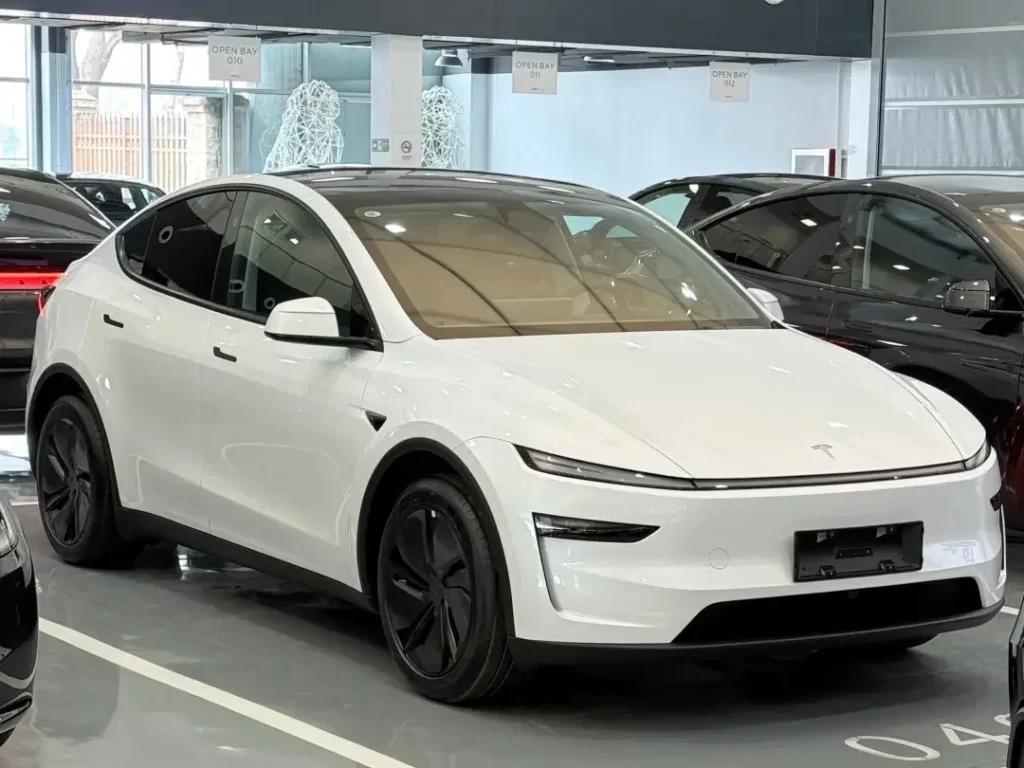
Возможно, вы начнете с чисто практических соображений - улучшится обзорность, вы станете более уверенно держаться в пробках, на темных сельских дорогах. И вот однажды вы видите, как на заправке останавливается чистенький “билд”: стойка правильная, шины выглядят готовыми к неприятностям, а передняя часть имеет безошибочно узнаваемое "лицо". Не агрессивное ради него - просто сосредоточенное. Вы замечаете, что дело не только в фарах. Это тонкий отблеск, встроенный в решетку радиатора, придающий автомобилю более четкий визуальный центр.
В этом и заключается очарование огни решетки автомобиля. Если все сделано правильно, то подсветка гриля это не просто украшение. Она может улучшить узнаваемость, добавить функциональный предупреждающий слой в плохую погоду и создать фирменный стиль, в котором чувствуется “заводской плюс”, а не “послепродажный хаос”. Если сделать это некачественно, то появятся блики, проблемы с проводкой, а иногда и юридические неприятности.
Давайте разберемся, что такое автомобильная подсветка решетки радиатора, как это сделал бы настоящий владелец и настоящий установщик: что это такое, какие типы существуют, как их выбрать и подключить, какие законы нужно соблюдать и куда движется рынок. Попутно я расскажу реальную историю из мастерской, связанную с постройкой Land Cruiser, где простая установка на решетку радиатора превратилась в самую практичную модификацию грузовика.
Что такое автомобильная подсветка решетки?
На самом простом уровне, огни решетки автомобиля установлены осветительные приборы в зоне передней решетки или рядом с ней транспортного средства. В зависимости от конструкции и местных правил они могут быть:
- Декоративное акцентное освещение (для создания фирменного образа, подчеркивания линий тела или повышения узнаваемости в ночное время)
- Функциональное дополнительное освещение (для улучшения видимости или в качестве предупреждающего сигнала в условиях недостаточной видимости - там, где это разрешено)
- Встроенные модули освещения в сочетании с датчиками (на некоторых новых автомобилях подсветка решетки радиатора разработана с учетом радаров/камер и заводского стиля)
Решетка радиатора - самое подходящее место, потому что она находится в переднем “центре внимания”. Люди естественно смотрят туда - особенно ночью. Это делает ее мощным средством идентификации и узнаваемости. Поэтому нужно быть осторожным: любой свет, размещенный спереди и по центру, может отвлекать внимание или быть незаконным, если он имитирует аварийное освещение или создает блики.
Почему люди устанавливают подсветку для гриля (помимо “это выглядит круто”)
Автомобильная культура всегда будет включать в себя эстетику, и это не плохо. Но лучшие сборки не устанавливают детали только для того, чтобы установить их. Они решают проблему или поднимают уровень реального использования.
Вот что обычно дают автомобильные гриль-фары при правильном проектировании и установке:
1) Лучшее распознавание и “визуальная фокусировка”
Подсветка решетки радиатора создает мощный визуальный ориентир. На темной дороге она может помочь другим водителям распознать местоположение и ширину автомобиля быстрее, чем по одним только фарам, особенно если подсветка решетки радиатора выполнена в виде контролируемого, не бликующего акцента.
2) Практическое наличие предупреждений (с большими юридическими оговорками)
В некоторых изделиях есть режимы мигания или стробоскопа, которые могут улучшить видимость в тумане, под проливным дождем, в пыли или при остановке на дороге. Вот где нужно быть осторожным: во многих регионах, стробоскопические шаблоны и некоторые цвета запрещены для аварийных или разрешенных автомобилей.
Концепция полезна, но исполнение должно соответствовать требованиям.
3) Персонализация, которая при этом остается “чистой”.”
По сравнению с массивными планками на крыше или открытыми дополнительными фонарями, подсветка решетки радиатора может быть интегрирована таким образом, чтобы выглядеть аккуратно и намеренно. Вы сможете сохранить линии автомобиля, избежать “прикручивания” и снизить шум ветра.
4) Более эффективное использование фронтальной недвижимости
В области решетки радиатора часто есть место для кронштейнов и корпусов, которые не будут мешать открыванию капота, установке багажников на крышу или грузовых систем. Для внедорожников это отличный способ добавить возможностей, не нагромождая дополнительное оборудование.
Типы автомобильных фонарей для решетки радиатора: От простых до очень умных
На рынке представлено множество стилей, но большинство из них делятся на три функциональных семейства.
1) Статические / постоянно включенные фонари для гриля
Это категория “чисто и просто”.
- Обычно это светодиодные ленты, капсулы или небольшие модули
- Один основной режим: включение/выключение (иногда с регулировкой яркости)
- Лучший выбор: тонкий фирменный стиль, дневное присутствие (там, где это законно), а также установка без лишних хлопот.
Если вы собираете повседневный автомобиль и хотите что-то, что не будет кричать о необходимости внимания, начните с этого.
2) Светильники для гриля с динамическим эффектом (поток, дыхание, стробоскоп)
В эту категорию входят:
- Текучесть/бегучесть
- Дыхательные/пульсирующие эффекты
- Режимы стробоскопа/мигания
Они широко распространены на рынке модификаций, поскольку визуально выглядят эффектно. При безответственном использовании или имитации аварийного освещения они также могут стать самым быстрым путем к проблемам. Динамические эффекты следует использовать обдуманно - в идеале только на бездорожье, в частных владениях, на выставках или там, где это разрешено правилами.
3) Встроенная подсветка решетки радиатора (с датчиками или заводскими матрицами)
В некоторых автомобилях высшего класса подсветка решетки радиатора используется как часть “световой подписи”, иногда согласованной с датчиками и камерами. На вторичном рынке также можно найти решения с креплениями, удобными для датчиков, но при этом необходимо соблюдать правила:
- Радар/камера прямой видимости
- Управление теплом
- Поток воздуха к радиатору и интеркулеру
- Прочность крепления (отсутствие вибрации, которая размывает системы камер или ослабляет крепления)
Здесь важно профессиональное планирование.
Реальная история: Сборка Land Cruiser, которая заставила гриль-светильники почувствовать, что это того стоит“
Владельцы Land Cruiser обычно не гонятся за трендами. Они гонятся за надежностью.
Во многих кругах энтузиастов Land Cruiser - часто называемый “Land Cruiser” или “LC200” - имеет репутацию, граничащую с легендой: грязевые ямы на юге, пустынные трассы на севере, дальние пробеги по пересеченной местности, где единственное правило - “не нарушать”. Владельцы модифицируют их, но, как правило, с определенной целью: бамперы, противоскользящие накладки, подвеска, багажники на крышу, ящики, лебедки.
Однажды к нам пришел клиент с простым вопросом: “Вы когда-нибудь устанавливали внутренние огни решетки радиатора на этой модели?”
Честный ответ был: "Нет, пока нет". Но в это же время в мастерской находился другой клиент, которому требовалась другая передняя часть: внутреннее крепление лебедки. Это означало, что передняя часть уже была измерена, доступна и смоделирована. Время было идеальным.
Вместо того чтобы принудительно подгонять стандартный кронштейн, техники поступили так, как поступают хорошие строители: они имитировал положение на реальном автомобиле, Затем изготовил кронштейн, который соответствовал геометрии решетки радиатора и точкам крепления. Это не было броско. Он был точным.
Мы отправили образец на завод, внесли небольшие изменения в соответствии с требованиями к установке и эстетике, а затем изготовили более чистый окончательный вариант кронштейна. Разница была очевидна - одно из тех улучшений, которые “выглядят так, как будто это должно было быть с самого начала”.
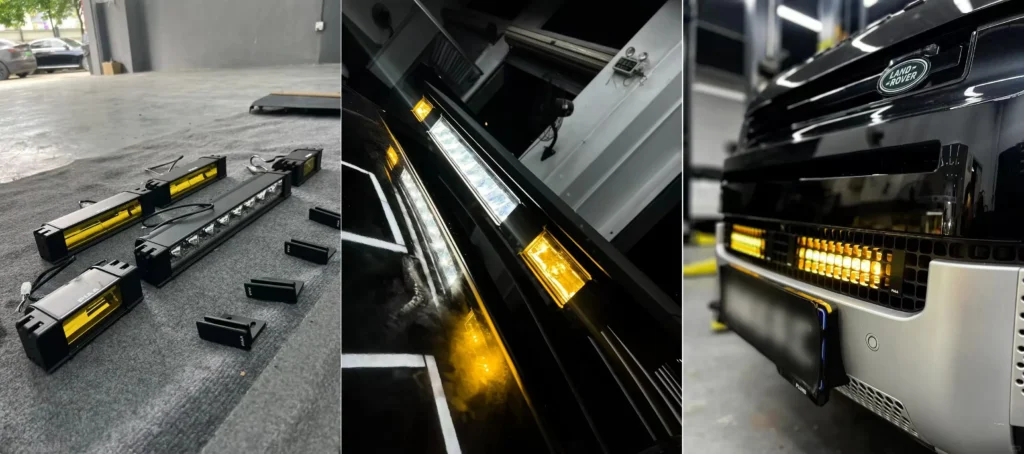
Заказчик выбрал смешанную установку: одна пара желтого цвета, одна пара белого цвета, на отдельных цепях. Это означало, что освещение может соответствовать различным условиям:
- Белый для общего освещения переднего плана (когда это необходимо)
- Желтый - для лучшей контрастности в пыли, дожде и дымке (и более мягкого восприятия бликов).
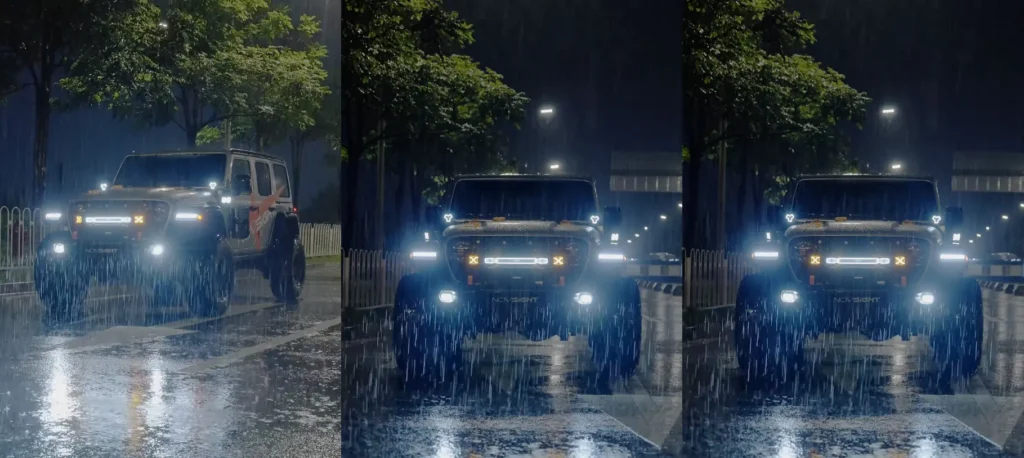
Примерно через два часа все было смонтировано, подключено, проверено и выровнено так, что луч четко прорезал отверстия в решетке радиатора. Был еще ранний вечер, поэтому “вау-фактор” расстояния еще не был полностью заметен, но даже тогда можно было сказать, что оптика направлена правильно. Никакого случайного рассеивания. Никакого “света повсюду, кроме того места, где он нужен”.”
Прежде чем клиент уехал, кто-то сделал снимок передней части автомобиля. Фары выглядели как два маленьких солнца, аккуратно спрятанных за решеткой радиатора. Практично, аккуратно и очень в духе Land Cruiser.
Это идеальный результат для автомобильной подсветки решетки: не диковинка, а инструмент, который к тому же отлично выглядит.
Как выбрать фары для решетки радиатора автомобиля, о которых вы потом не будете жалеть
Купить подсветку решетки радиатора легко. Купить правильные фонари на решетку радиатора - совсем другое дело.
Вот критерии, которые имеют наибольшее значение, объясненные на языке владельцев, а не на языке маркетинга.
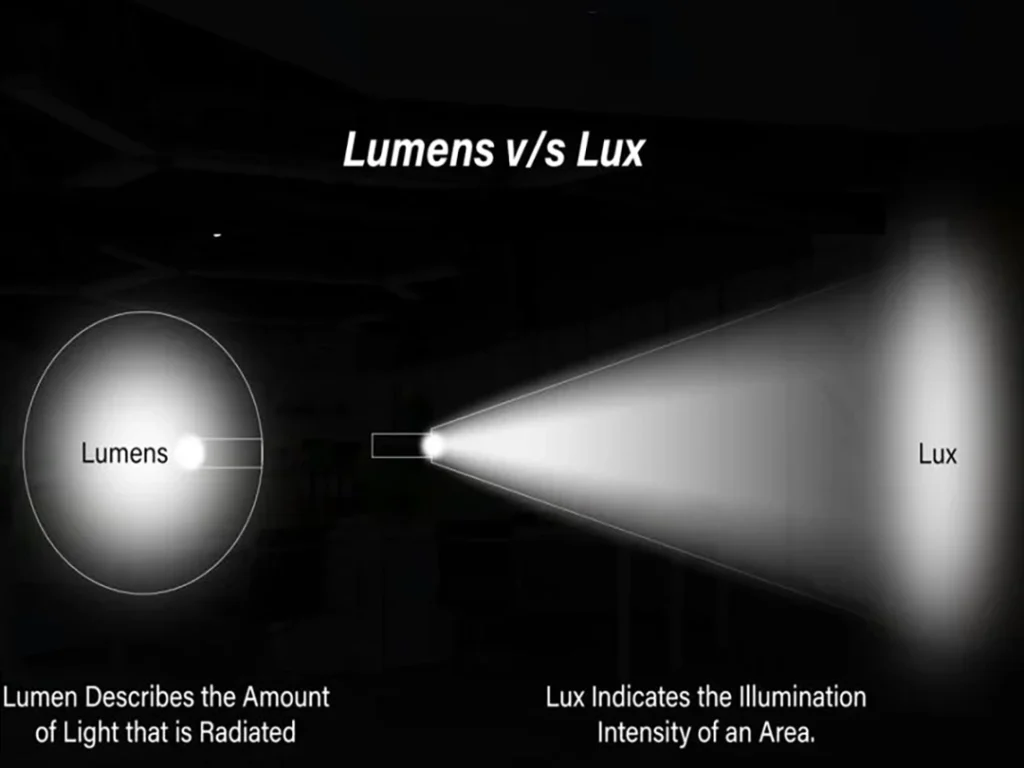
1) Управление яркостью и лучом (не просто “больше люмен”)
Многие объявления кричат о люменах, но на самом деле вопрос заключается в следующем:
- Свет контролируемый (хорошая оптика, сфокусированный бросок, минимум бликов)?
- Или это просто яркий светодиод, рассеивающий свет повсюду?
Для вспомогательных ламп, установленных на решетке радиатора, важна форма луча, поскольку свет располагается близко к осевой линии автомобиля и может легко создавать блики или отражаться от блестящих поверхностей решетки. Ищите изделия с правильной оптикой и корпусом, который справляется с рассеянным светом.
2) Цветовая температура, которая хорошо сочетается с реальным вождением.
Обычный безопасный диапазон для многих водителей составляет около 5000K-6500K для получения белого цвета (чисто белого, не слишком синего). Если вы смешиваете белый и желтый, делайте это намеренно:
- Белый: четкий передний обзор, хорошее общее восприятие
- Желтый/янтарный: лучший контраст в пыли/тумане/дожде, меньше бликов
Избегайте эффектов “случайной радуги” для дорожного использования. Оставьте режим шоу для шоу-настроек.
3) Водонепроницаемость: обращайтесь с решеткой как с зоной мойки под давлением
Решетка радиатора:
- Дождь и брызги
- Дорожная соль
- Жучки и мусор
- Мойка под давлением
Хорошей целью является IP67 или выше, плюс достойная герметизация и коррозионностойкие разъемы. Сам светодиод может выжить в воде, но дешевые разъемы - нет.
4) Материал корпуса и управление теплом
Светодиоды ненавидят тепло. Чем лучше продукция, тем лучше:
- Корпуса из алюминиевого сплава
- Правильные теплоотводы
- Продуманные тепловые пути
Это не просто долговечность - это стабильность выходного сигнала. Перегрев может привести к затемнению, мерцанию или преждевременному выходу из строя.
5) Совместимость с автомобилем и качество монтажа
Универсальный светильник может подойти, но крепление часто решает, насколько профессионально будет выполнена установка.
- По возможности выбирайте кронштейны, предназначенные для вашей модели
- Убедитесь, что поток воздуха через решетку не сильно перекрыт
- Убедитесь, что свет не мешает датчикам, жалюзи или активным системам решеток
Для некоторых автомобилей может потребоваться снять передний бампер, чтобы выполнить работу правильно. Если вас это не устраивает, обратитесь к профессионалам.
Установка и подключение: Раздел “Делать это чисто или не делать”
Освещение решетки радиатора - дело несложное, но его легко испортить. Разница между надежной установкой и электрическим гремлином часто сводится к нескольким привычкам.
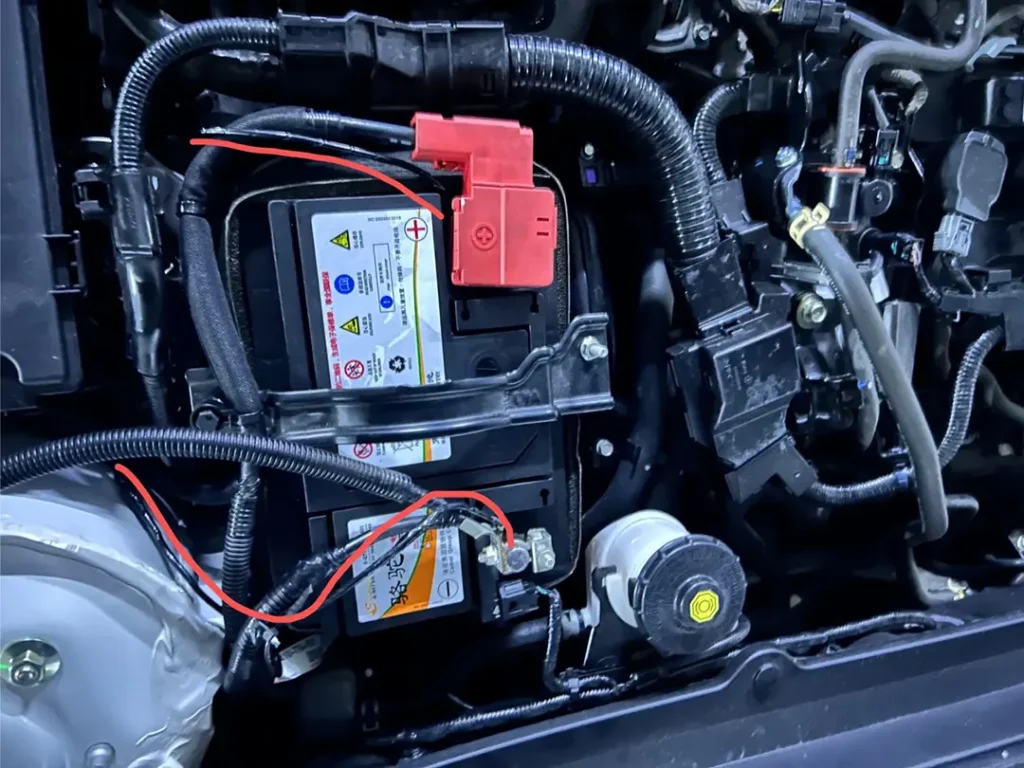
Безопасность превыше всего: отключите питание
Перед проведением любых электромонтажных работ:
- Отсоедините отрицательную клемму аккумулятора
- Избегайте случайных замыканий
- Защитите чувствительную электронику
Современные автомобили - это, по сути, сети. Обращайтесь с ними бережно.
Инструменты и материалы, которые действительно имеют значение
Вам не нужна целая мастерская, но вам понадобятся необходимые основы:
- Зачиститель/обжимной станок для проводов
- Термоусадка или качественная электрическая лента
- Стяжки или ткацкий станок
- Надлежащие водонепроницаемые разъемы (настоятельно рекомендуется)
- Предохранитель (не пропустите)
- Реле, если вы потребляете значительный ток
Если вы запомните только одно правило: Надежные, герметичные соединения всегда выигрывают у “закручивания и заклеивания”.
Практичный подход к подключению (обычная установка 12 В)
Многие комплекты подсветки решетки радиатора используют простую схему подключения, например:
- Красный провод: положительный (+)
- Черный провод: отрицательный (-)
- Желтый провод (если есть): пусковой/сигнальный провод (интеграция фар или сигналов поворота)
Стабильный подход заключается в использовании предохранителя для подключения к аккумулятору и запуска через источник зажигания или дополнительного оборудования, чтобы свет случайно не остался включенным и не разрядил аккумулятор.
Пошаговый рабочий процесс (мышление установщика)
- Планируйте монтажное положение
- Проверьте отверстия в решетке, поток воздуха, зазор между датчиками
- Убедитесь, что путь лучей не будет перекрыт решетками
- Макетирование и согласование
- Временно установите светильники
- Проверьте симметрию и прицеливание
- Прокладывайте проводку безопасно
- Держите вдали от острых краев и горячих деталей
- В местах прохода проводов через панели используйте петли и втулки.
- Создавайте надежные соединения
- Обжимайте правильно
- Герметизация с помощью термоусадки
- Добавьте разгрузку от натяжения, чтобы вибрация не нагружала сустав
- Проверка перед сборкой
- Включите автомобиль
- Проверьте все режимы
- Подтвердите отсутствие мерцания, отсутствие предупреждающих индикаторов на приборной панели
- Окончательное прицеливание
- Направьте полезную часть луча туда, куда вам нужно.
- Старайтесь не смотреть в глаза встречным.
Когда следует обращаться к профессионалам
Если хотя бы один из этих пунктов применим, стоит обратиться к профессионалам:
- Вы не умеете читать электропроводку автомобиля
- Ваша модель требует снятия бампера или сложной разборки
- Вам нужна интеграция с фарами/сигналами поворота без ошибок
- Вам нужна заводская чистота (без видимой проводки, без дребезжания).
Чистая установка - это то, что позволяет подсветке решетки выглядеть “премиально”. При неаккуратной установке даже дорогие светильники выглядят дешево.
Правовое обеспечение и соответствие: Часть, о которой все забывают, пока не становится слишком поздно
Этот раздел зависит от страны и региона, поэтому рассматривайте его как принципы, а не как универсальный закон.
Общие зоны правового риска
- Мигающие/стробоскопические режимы на дорогах общего пользования
- Часто ограничивается разрешенными транспортными средствами
- Даже если ваш фонарь поддерживает стробоскоп, вам может быть запрещено использовать его на дороге
- Запрещенные цвета
- Красные/синие комбинации часто используются для экстренных служб
- В некоторых регионах красные и синие цвета полностью ограничивают движение вперед
- Блики и чрезмерная яркость
- Если свет создает блики, он может считаться небезопасным, даже если он “просто белый”.”
Практические советы по соблюдению требований (с учетом интересов владельца)
- Выбирайте продукты с хорошей репутацией и признанными заявлениями о соответствии (например, стандартам ECE, где это уместно).
- Избегайте цветов и узоров, напоминающих о чрезвычайных ситуациях
- Используйте режимы, соответствующие дорожным требованиям, на дороге, а для бездорожья/частного использования зарезервируйте режимы show/strobe.
- Если местные правила требуют проверки или регистрации модификаций, позаботьтесь об этом заранее, а не после получения штрафа.
Цель проста: быть замеченными, не быть проблемой.
Тенденции и технологии: Куда движутся гриль-лампы
Раньше подсветка решетки радиатора представляла собой обычную светодиодную ленту. Теперь она быстро развивается.
1) Более разумное управление и персонализация
Новые автомобили и более дорогие комплекты послепродажного обслуживания становятся все более популярными:
- Настройки режимов (драйв, экономия, внедорожный профиль)
- Пульт дистанционного управления, работающий в перчатках и в холодную погоду
- Более изысканные переходы и затемнения (меньше “дешевого мигания”, больше “контролируемой анимации”)
2) Модульная ремонтопригодность
Не менее важной инновацией является модульная конструкция: если один светодиодный модуль выходит из строя, вы заменяете только эту секцию, а не всю панель. Это сокращает затраты на ремонт и время простоя - особенно для автопарков и автомобилей, используемых в тяжелых условиях.
3) Улучшенная тепловая и ресурсная инженерия
Продукция премиум-класса ориентирована на:
- Конструкция для рассеивания тепла
- Стабильные драйверы (меньше мерцания)
- Более высокие заявленные сроки службы с реальным тепловым запасом
В реальности это означает меньшее количество поломок после мойки под давлением, летней жары или длительных поездок по неровным дорогам.
Практические примеры использования: Сопоставление фонарей решетки с реальным вождением
Многие ошибки при покупке происходят из-за несоответствия продукта сценарию. Вот простое руководство по подбору пары.
Повседневная езда (город/пригород)
- Выберите: постоянное включение, тонкий акцент, контролируемая яркость
- Приоритеты: законность, низкий уровень бликов, чистый внешний вид
Шоссе и дальние поездки
- Выбор: качественная оптика, стабильная проводка, надежная гидроизоляция
- Приоритеты: надежность, виброустойчивость, простота обслуживания
Бездорожье и оверлендинг
- Выбор: прочный корпус, IP67+, подходящие крепления
- Рассмотрим: смешанная бело-желтая установка для условий
- Приоритеты: долговечность, практичное размещение балок, простота ремонта
Выставки и встречи
- Выберите: динамические эффекты (там, где это разрешено)
- Приоритеты: визуальный дизайн, синхронизация, чистая установка
Распространенные ошибки (и как их избежать)
Даже хорошие продукты могут оказаться неудачными, если пренебречь основами.
- Без предохранителяКороткий день без защиты - это плохой день.
- Дешевые разъемы: вода попадает внутрь, начинается коррозия, появляется мерцание.
- Плохое прицеливание: свет кажется ярким, но не помогает видеть; также ослепляет других.
- Блокировка воздушного потокаПерегрев систем двигателя для получения холодного блеска передней части - это нечестная сделка.
- Игнорирование местных правилСтробоскоп на дорогах общего пользования - самый быстрый способ превратить забавный мод в штраф.
Подсветка решетки радиатора должна добавлять уверенности, а не тревоги.
Основные выводы: Светильник для гриля должен ощущаться как заводская модернизация
Автомобильные фары для решетки радиатора стали более зрелыми. Они больше не являются просто декоративными полосками - они могут быть хорошо интегрированным сочетанием индивидуальности и функциональности. Лучшие результаты достигаются благодаря простой философии:
- Выбирайте управляемое, долговечное освещение
- Установите его чисто и безопасно
- Соблюдайте требования
- Используйте режимы ответственно
В этой истории о Land Cruiser все ясно: известная своей прочностью конструкция добавила осветительную систему на решетку радиатора не для того, чтобы привлечь внимание, а для того, чтобы получить практические возможности и более четкое оформление передней части. Когда кронштейн сделан правильно, проводка герметична, а луч выровнен по решетке радиатора, результат не выглядит “аксессуаром”. Он выглядит как часть автомобиля.
Краткий контрольный список (перед покупкой)
- Степень защиты IP: IP67+
- Корпус: предпочтительно алюминиевый сплав
- Проводка: предохранители, герметичные разъемы, безопасная прокладка
- Цвет: избегайте цветов, напоминающих о чрезвычайных ситуациях; придерживайтесь вкуса
- Луч: управляемая оптика > сырая яркость
- Установка: профессиональная помощь, если требуется демонтаж бампера или сложная интеграция
- Юридические: уточните, какие цвета/режимы разрешены в вашем регионе
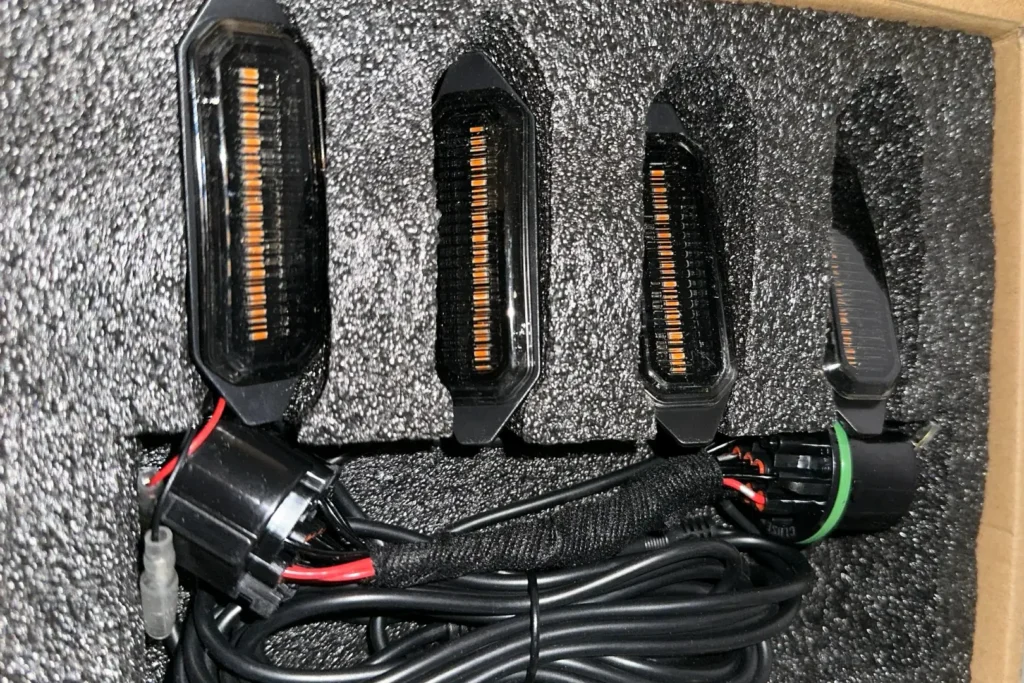
Уже установили фонари для гриля или собираетесь это сделать? Прежде чем двигаться дальше, ознакомьтесь с Детали подключения и распаковки, которые втихую решают, останутся ли светодиодные фонари для гриля надежными спустя месяцы.