Cài đặt Đèn pha LED Bi Projector Có thể nâng cao đáng kể hiệu suất chiếu sáng và thẩm mỹ của xe hơi. Hướng dẫn này sẽ hướng dẫn bạn từng bước qua quy trình lắp đặt, kèm theo các ví dụ thực tế và đánh giá của người dùng để giúp bạn hiểu rõ lợi ích của việc nâng cấp lên đèn Bi LED.
Công cụ và vật liệu cần thiết
- Đèn pha LED Bi Projector bộ dụng cụ
- Các dụng cụ cầm tay cơ bản (tua vít, cờ lê, kìm)
- Kết nối dây
- Băng dính điện
- Ống co nhiệt
- Đồng hồ vạn năng
- Kính bảo hộ
- Găng tay
Bước 1: Chuẩn bị
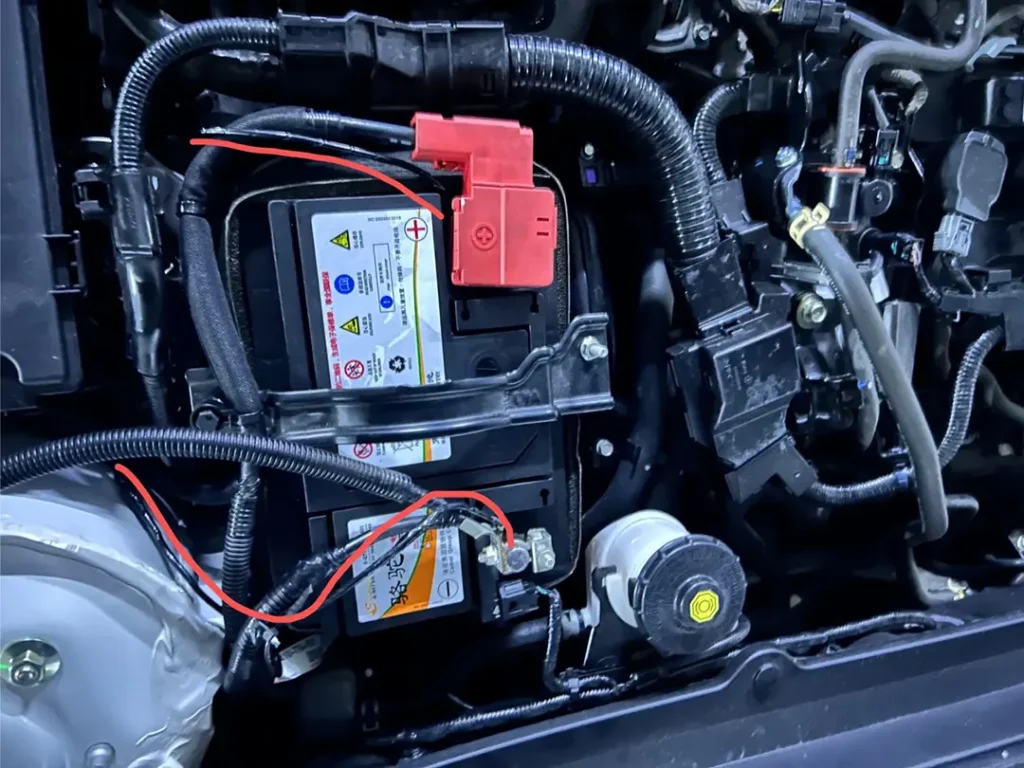
- Ngắt kết nối ắc-quyAn toàn là trên hết! Hãy tháo cực âm của ắc-quy ô tô để tránh các sự cố chập điện trong quá trình lắp đặt.
- Thu thập công cụHãy đảm bảo rằng bạn đã chuẩn bị đầy đủ các công cụ và vật liệu cần thiết trước khi bắt đầu quá trình lắp đặt.
- Đọc Hướng dẫn sử dụngXem lại hướng dẫn lắp đặt đi kèm với đèn pha Bi LED của bạn để biết các hướng dẫn cụ thể hoặc cảnh báo.

Bước 2: Tháo đèn pha cũ
- Truy cập vào Bộ đèn phaMở nắp ca-pô xe của bạn và tìm bộ đèn pha. Bạn có thể cần tháo lưới tản nhiệt hoặc các bộ phận khác để tiếp cận dễ dàng hơn. Mở nắp ca-pô xe của bạn và tìm bộ đèn pha. Bạn có thể cần tháo lưới tản nhiệt hoặc các bộ phận khác để tiếp cận dễ dàng hơn.
- Ngắt kết nối Bộ dây điện: Cẩn thận tháo dây cáp điện khỏi phía sau đèn pha cũ.
- Tháo cụm đèn phaTháo các ốc vít hoặc bu lông cố định và nhẹ nhàng kéo cụm đèn pha ra khỏi vỏ.
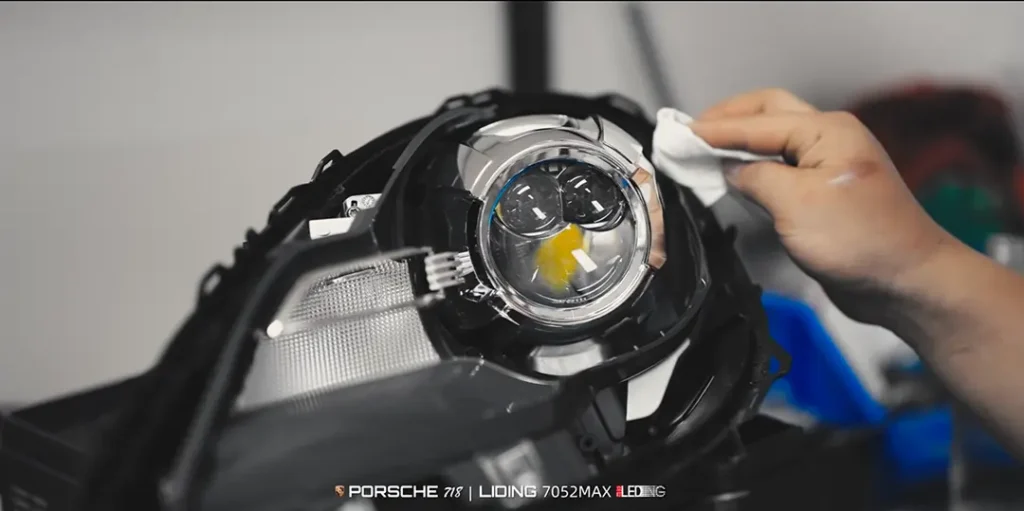
Bước 3: Lắp đặt đèn pha Bi LED
- Chuẩn bị đèn pha mớiNếu đèn pha Bi LED của bạn đi kèm với giá đỡ, hãy gắn nó vào đèn pha trước khi lắp đặt.
- Cắm máy chiếuĐặt đèn chiếu sáng Bi LED vào vỏ đèn pha. Đảm bảo đèn được lắp đặt chắc chắn và căn chỉnh chính xác với các điểm gắn.
- Kết nối dây điệnKết nối bộ dây điện từ đèn Bi LED với hệ thống dây điện của xe. Sử dụng các đầu nối dây và băng dính điện để cố định các kết nối. Nếu cần thiết, tham khảo sơ đồ dây điện được cung cấp trong sách hướng dẫn.
- Kết nối niêm phongSử dụng Ống co nhiệt Để che phủ các dây điện và kết nối lộ ra nhằm bảo vệ chúng khỏi độ ẩm và ăn mòn.
Bước 4: Kiểm tra đèn pha
- Kết nối lại pin: Nối lại cực âm của ắc-quy.
- Kiểm tra chức năngBật đèn pha để kiểm tra chức năng của chúng. Đảm bảo cả đèn pha gần và đèn pha xa đều hoạt động chính xác.
- Kiểm tra độ thẳng hàngNếu đèn pha có thể điều chỉnh, hãy kiểm tra độ chính xác của đèn để đảm bảo chùm sáng được chiếu đúng trên đường.
Bước 5: Hoàn tất cài đặt
- Gắn chặt cụm đèn phaSau khi tất cả các bộ phận đã được kiểm tra và hoạt động bình thường, hãy cố định cụm đèn pha bằng ốc vít hoặc bu lông.
- Lắp ráp lại các bộ phận đã tháo ra.Nếu bạn đã tháo bất kỳ bộ phận nào (như lưới tản nhiệt), hãy lắp lại chúng một cách chắc chắn.
- Dọn dẹp: Vui lòng loại bỏ tất cả các vật liệu đóng gói và dụng cụ được sử dụng trong quá trình lắp đặt.
Đánh giá của người dùng: Tại sao nên chọn đèn pha LED Bi Leding?
Nhiều người dùng đã chia sẻ những trải nghiệm tích cực sau khi nâng cấp lên đèn pha Bi LED của Leding. Dưới đây là một số đánh giá:
- John D.“Tôi đã lắp đặt đèn pha Bi LED của Leding cho chiếc Honda Civic của mình, và sự khác biệt thật sự rõ rệt! Ánh sáng phát ra vô cùng sáng và tập trung, giúp việc lái xe ban đêm an toàn hơn nhiều. Quá trình lắp đặt rất đơn giản, và tôi rất hài lòng với hướng dẫn chi tiết.”
- Sarah L.Sau khi nâng cấp lên đèn pha LED Bi của Leding, tôi cảm thấy tự tin hơn khi lái xe vào ban đêm. Mẫu ánh sáng hoàn hảo và tôi rất thích vẻ ngoài hiện đại mà nó mang lại cho xe của mình. Rất khuyến khích cho bất kỳ ai muốn nâng cấp đèn pha của mình!“
- Mike R.“Tôi đã do dự khi chuyển sang đèn pha LED, nhưng sản phẩm của Leding đã vượt quá mong đợi của tôi. Việc lắp đặt rất đơn giản, và đội ngũ hỗ trợ khách hàng đã rất nhiệt tình khi tôi có thắc mắc. Độ sáng của đèn thật tuyệt vời!”
Nghiên cứu trường hợp: Nâng cấp Toyota Camry
Để minh họa lợi ích của việc lắp đặt đèn pha Bi LED, hãy xem xét một trường hợp cụ thể liên quan đến chủ sở hữu Toyota Camry, Lisa.
Bối cảnh
Lisa thường xuyên lái xe Camry vào ban đêm để đi làm. Cô thường thấy đèn pha halogen tiêu chuẩn không đủ sáng, dẫn đến tầm nhìn kém và gây mỏi mắt.
Quy trình cài đặt
Sau khi tìm hiểu các lựa chọn, Lisa đã quyết định chọn đèn pha Bi LED của Leding. Tuân theo hướng dẫn lắp đặt, cô đã hoàn thành việc nâng cấp trong khoảng hai giờ. Cô đánh giá cao sự rõ ràng và dễ hiểu của hướng dẫn, đồng thời cũng hài lòng với chất lượng của các linh kiện đi kèm trong bộ sản phẩm.
Kết quả
Sau khi lắp đặt, Lisa ngay lập tức nhận thấy sự khác biệt. Đèn Bi LED cung cấp ánh sáng sáng hơn và trắng hơn nhiều, giúp cải thiện tầm nhìn của cô đáng kể. Mẫu ánh sáng tập trung cho phép cô nhìn xa hơn trên đường mà không làm chói mắt các tài xế ngược chiều. Ngoài ra, cô còn nhận được nhiều lời khen ngợi về thiết kế sang trọng, hiện đại của đèn pha.
Kết luận
Trải nghiệm của Lisa đã làm nổi bật những lợi ích của việc nâng cấp lên đèn pha Bi LED. Không chỉ cải thiện trải nghiệm lái xe của cô, mà còn mang lại một phong cách thời trang cho chiếc xe của cô.
Các yếu tố cần xem xét thêm
Khi xem xét việc nâng cấp lên đèn pha Bi LED, điều quan trọng là phải xem xét thói quen lái xe và điều kiện đường sá thông thường của bạn. Ví dụ, nếu bạn thường xuyên lái xe ở khu vực nông thôn có ít đèn đường, khả năng quan sát được cải thiện nhờ đèn pha Bi LED có thể mang lại sự khác biệt đáng kể về mặt an toàn.
Hơn nữa, việc đầu tư vào đèn pha chất lượng cao như của Leding không chỉ cải thiện tầm nhìn mà còn tăng giá trị tổng thể của xe. Nhiều người dùng cho biết thiết kế hiện đại của đèn pha LED mang lại cho xe của họ vẻ ngoài mới mẻ và hiện đại, điều này có thể là yếu tố quan trọng nếu bạn có kế hoạch bán hoặc đổi xe trong tương lai.
Mẹo bảo trì
Để đảm bảo độ bền của đèn pha Bi LED mới của bạn, hãy tham khảo các mẹo bảo dưỡng sau:
- Vệ sinh định kỳGiữ cho ống kính đèn pha luôn sạch sẽ để đảm bảo hiệu suất chiếu sáng tối ưu. Sử dụng chất tẩy rửa nhẹ nhàng và khăn mềm để tránh trầy xước.
- Kiểm tra độ thẳng hàngThường xuyên kiểm tra độ chính xác của đèn pha, đặc biệt là sau khi đi qua ổ gà hoặc hố sâu. Độ chính xác của đèn pha đảm bảo tầm nhìn tối đa và tránh làm chói mắt các tài xế khác.
- Kiểm tra kết nốiThường xuyên kiểm tra các kết nối dây điện để phát hiện bất kỳ dấu hiệu hư hỏng hoặc ăn mòn nào. Điều này sẽ giúp ngăn ngừa các vấn đề về điện và đảm bảo hiệu suất ổn định.
Kết luận
Lắp đặt đèn pha Bi LED có thể cải thiện đáng kể khả năng quan sát ban đêm và mang lại cho xe của bạn một vẻ ngoài hiện đại. Bằng cách tuân theo các bước sau, bạn có thể lắp đặt thành công đèn pha mới và tận hưởng trải nghiệm lái xe an toàn hơn. Phản hồi tích cực từ người dùng như John, Sarah và Mike, cùng với các trường hợp nghiên cứu như của Lisa, cho thấy giá trị của việc đầu tư vào các giải pháp chiếu sáng chất lượng. Luôn tham khảo hướng dẫn của nhà sản xuất để biết chi tiết cụ thể liên quan đến mẫu xe của bạn.